MyChild 5.6
How To: Receive Text & Email Notifications from MyChild
Users of the MyChild 5 software can opt in to receive notifications via e-mail and/or text message by following the following process.
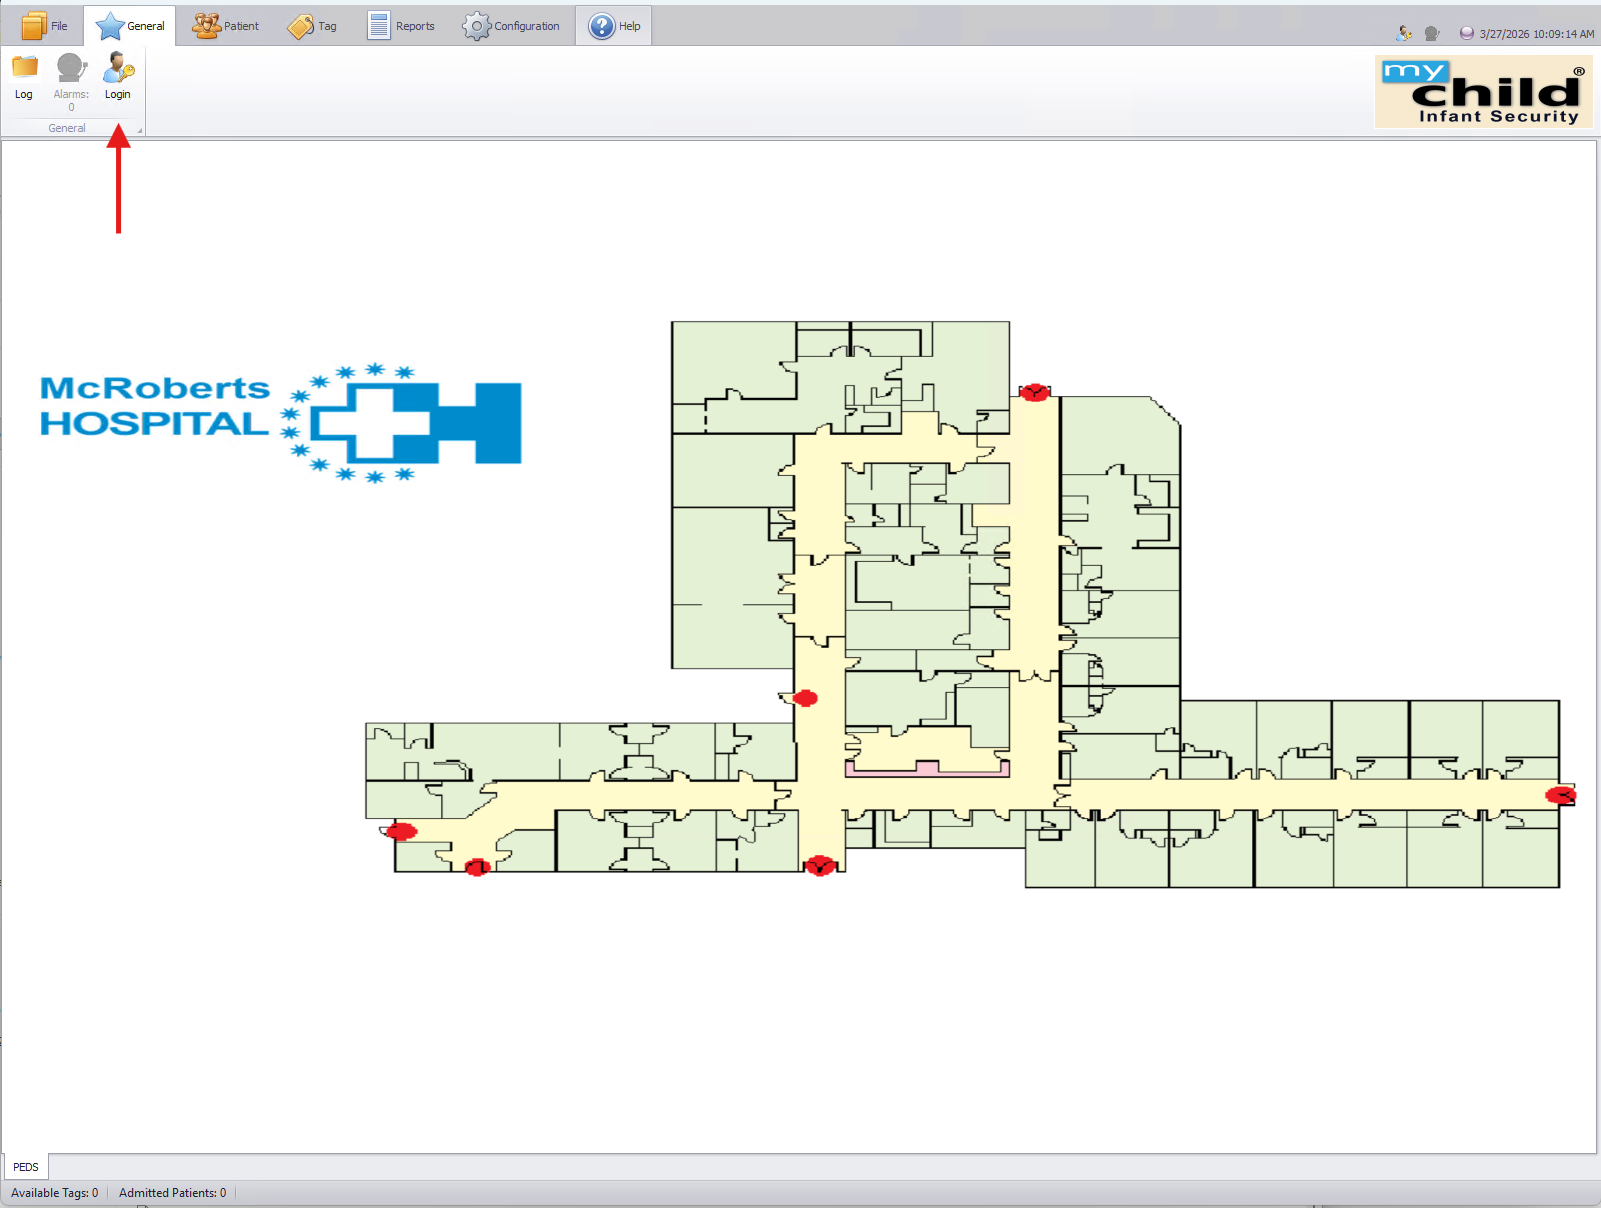
First login to the system by clicking "Login".
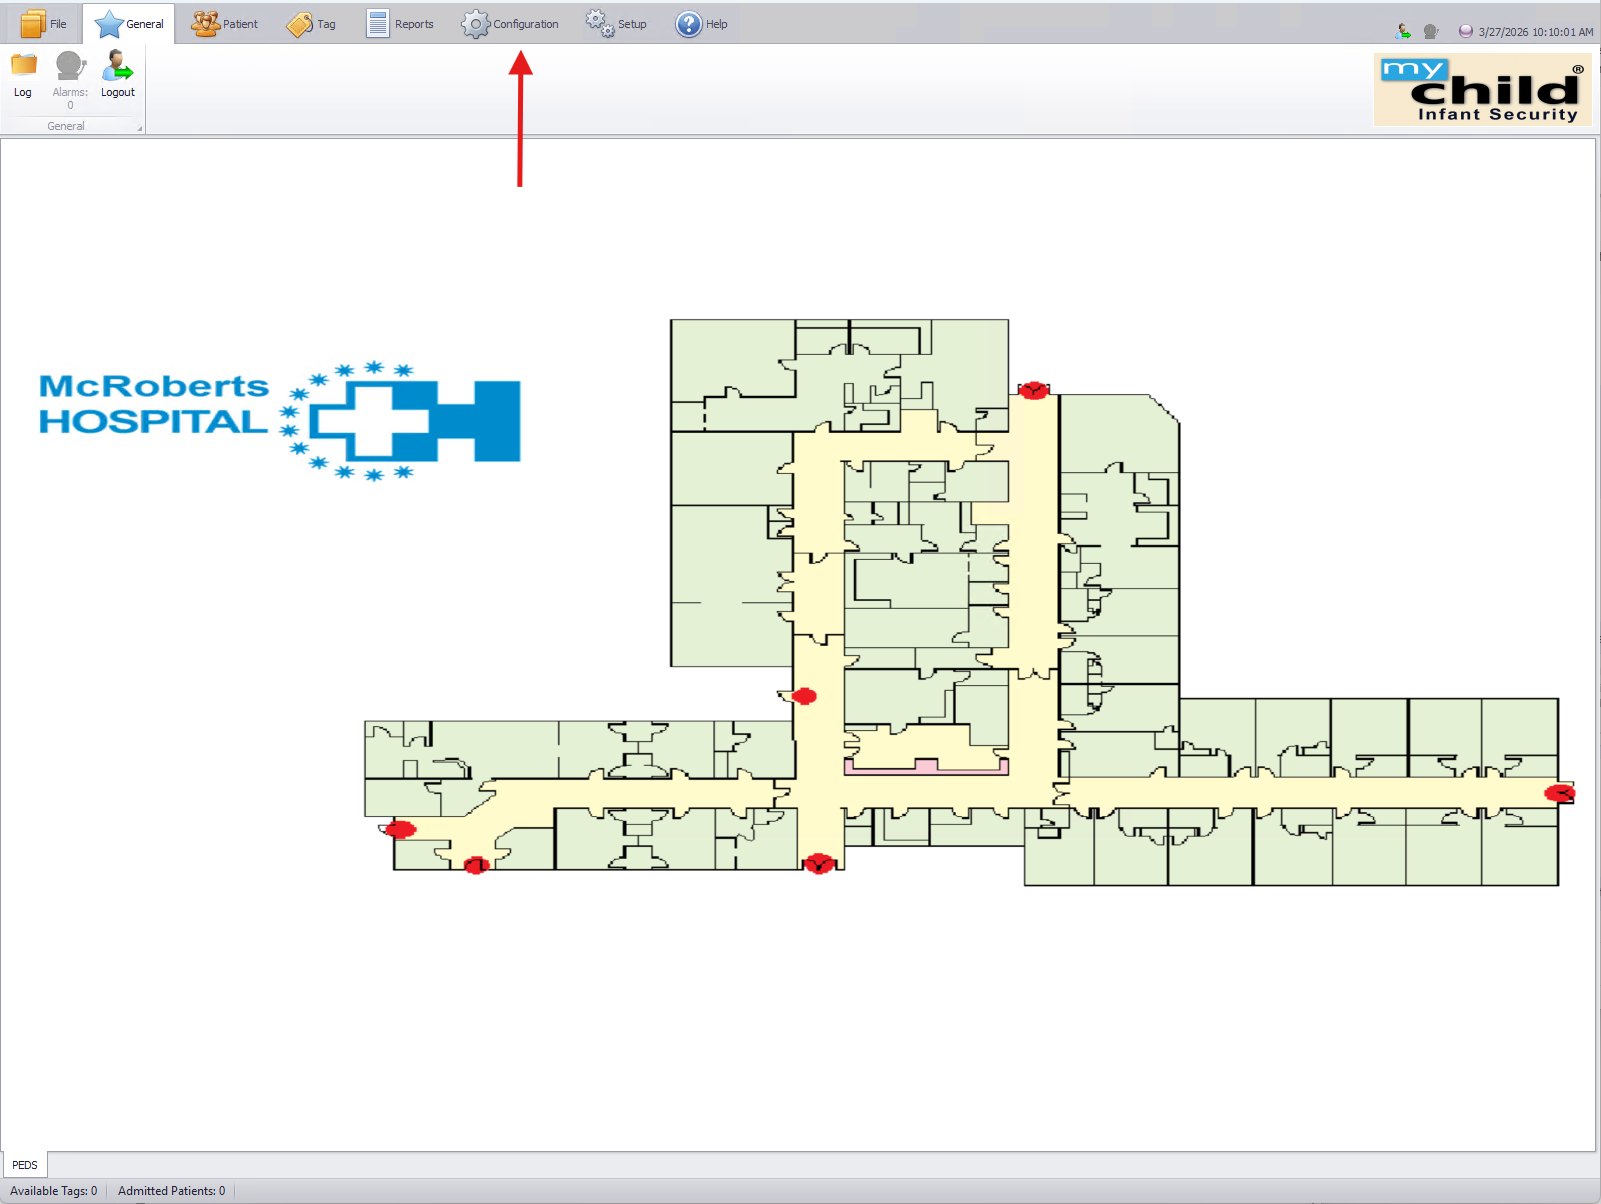
Once logged into the system, click on the "Configuration" tab.
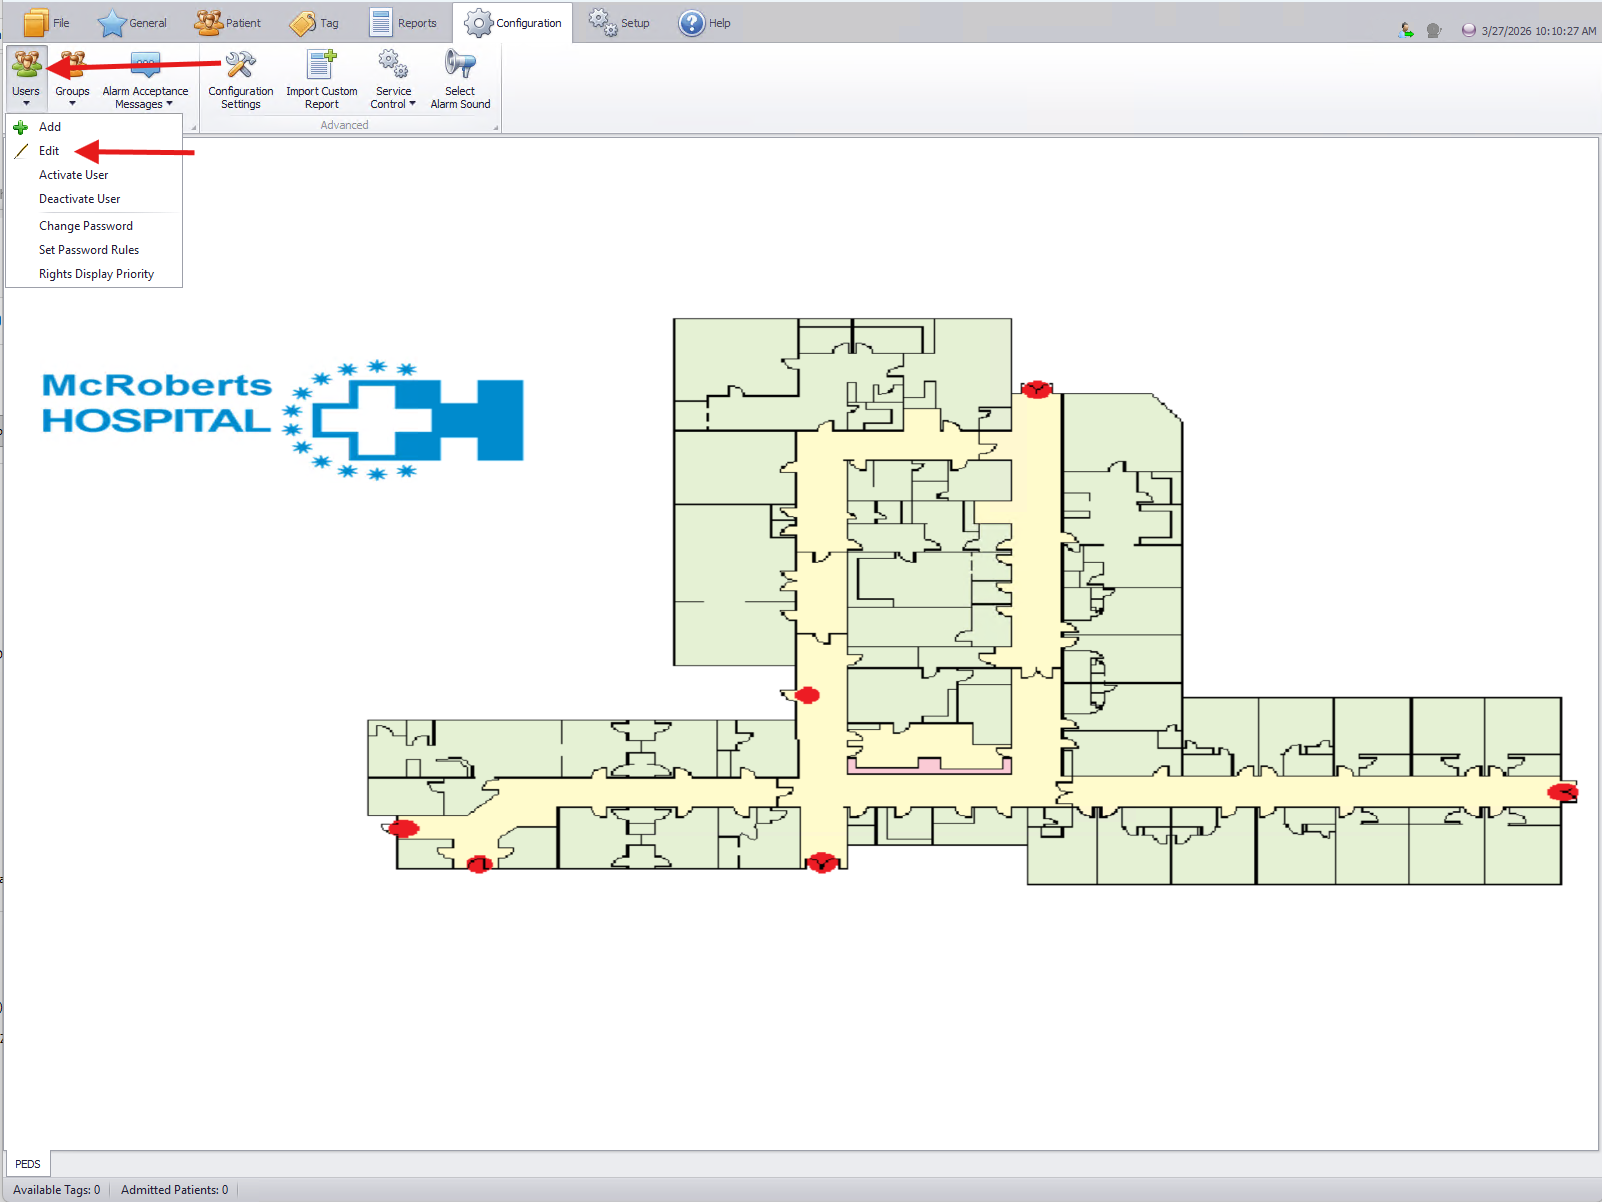
Once on the Configuration tab, click on "Users" and then "Edit".
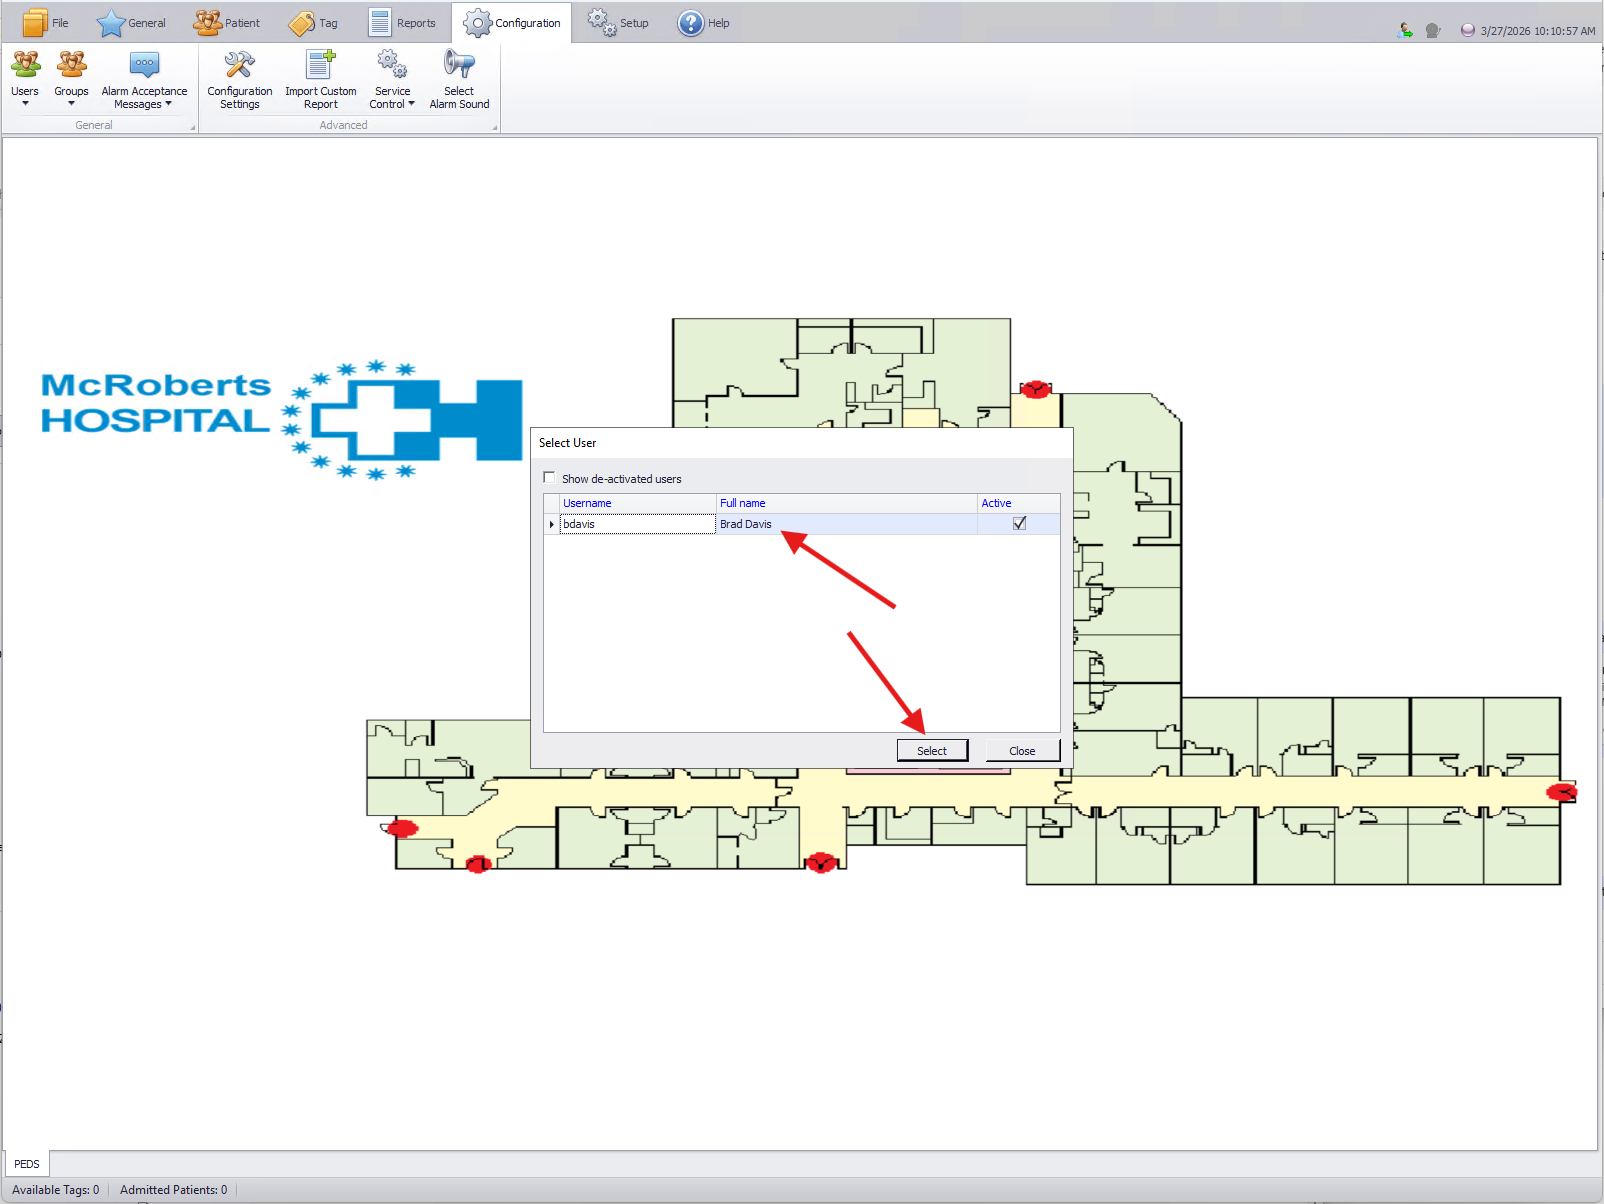
Select your user account from the popup as shown below.
On the edit user wizard, you will check the box marked "SMS Message / Email Alert".
Once selected the user can then enter the Email address and/or Phone number where messages should be sent.
Next the user will select what Severity levels (Alarm and/or warning) that they want to receive.
The user will select specific events they wish to receive.
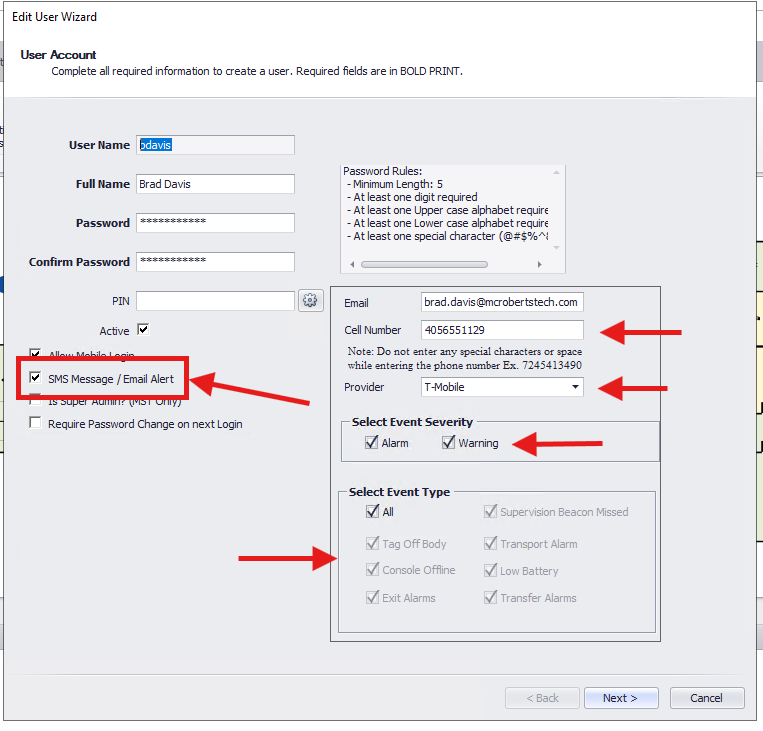
Once all information is entered, click Next to select user permissions.
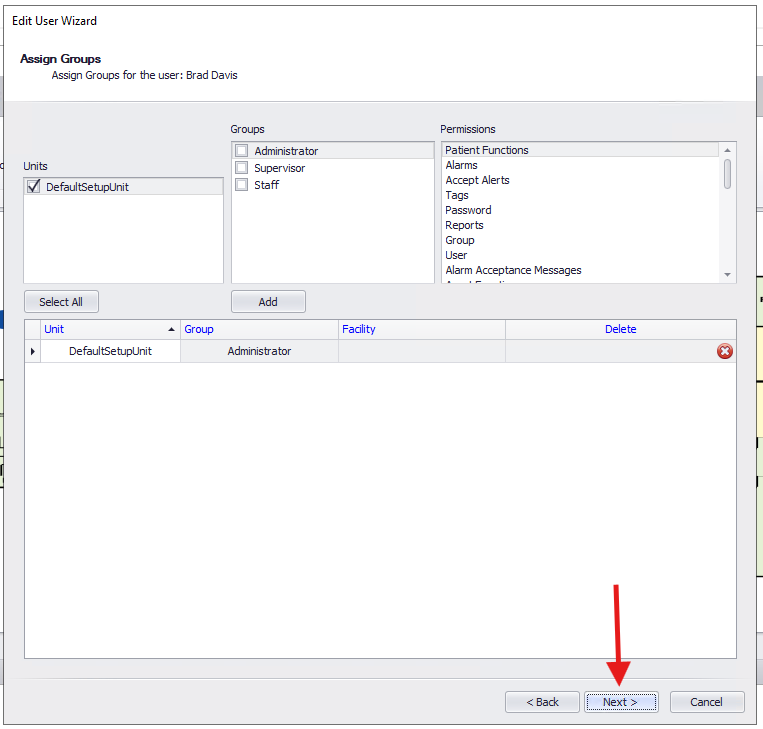
Review and update (if needed) user permissions, and then click next.
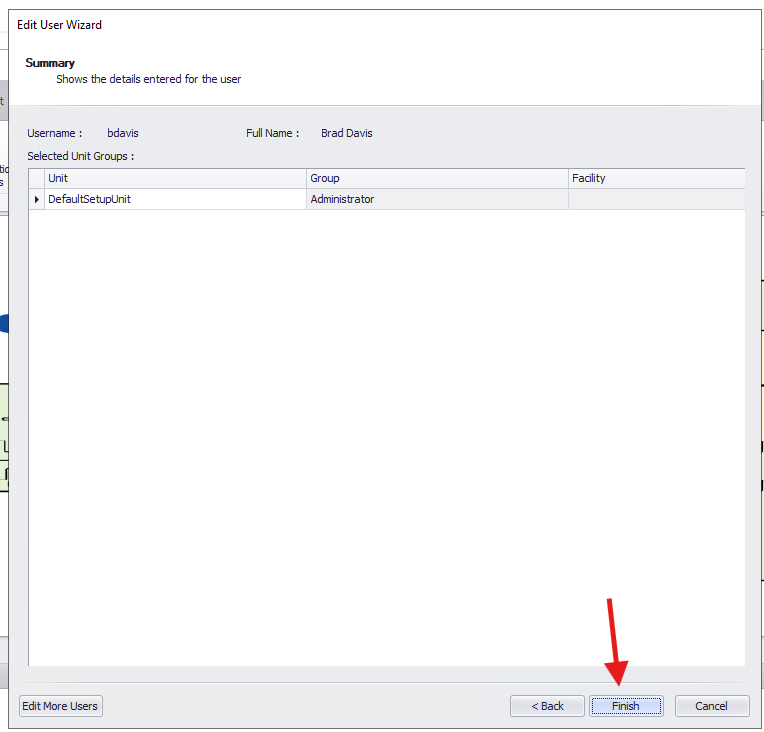
Verify everything has been entered correctly and click "Finish".
The user has now opted into receiving Emails and/or Text messages from the MyChild5 System.
Troubleshooting tips
MyChild User Troubleshooting Tips
Note: McRoberts Technologies maintains a 24/7/365 staffed Call Center for your technical support. To reach the Technical Support Desk call 800-776-7328 and press 2 to speak with Support Technician. Below are some tips for troubleshooting some common issues yourself.
I can’t see the MyChild application on my computer screen.
- If the screen is dark, the computer is likely turned OFF or unplugged. Check to ensure both the monitor and the computer are plugged in and turned on.
- If the screen is working but the MyChild application is not being displayed, it may have been “minimized” or shut down.
- Check to see if the MyChild icon is on the tool bar at the bottom of the screen. If so, double click on the icon to open the MyChild application.
- If there is no icon, click on the Start Menu in the lower left corner of the screen and open the MyChild application that way.
My username and/or password are not working.
- Name and password credentials are managed by your hospital IT staff. Seek a MyChild System Administrator for assistance.
I can’t find the MyChild tags.
- MyChild software can help! You can locate unassigned tags using the Tag Inventory Report. To view this report, sign in to MyChild, click on the Tag tab, and select Inventory. This opens a list of all tags and where they were last seen by the MyChild system. You can select any tag number on the list and right click to access the locate function. This function presents the floorplan with an indicator of where the missing tag was seen last. (For tag statuses, see next page.)
- Note: In a basic system (no receivers), only door controllers can report last seen location. Check the time and date column to make sure this location is current.
The tag I want to assign to a patient does not appear in the drop-down list of available tags.
- When a tag is removed from its pouch, it can take 30-40 seconds for it to auto-enroll in the system. Be patient!
- Be sure to remove the tag you want to use from its pouch 45 seconds before opening the tag enrollment window. Otherwise, you will need to close the window and re-open it again to refresh the list of available tags.
- If the tag you have selected does not automatically enroll itself in the MyChild software, check the tag’s battery using the Pocket Tag Reader/Tester. If the battery fails the test, contact McRoberts Tech Support at 800-776-7328, option 2, and request a Return Authorization (RA) Request Form that you can use to return the tag to McRoberts.
- Note: To prevent premature battery drain, MyChild Tags should always be stored in individual foil pouches. Tags not kept in individual foil pouches will experience RF (radio frequency) “chatter” between themselves that will drain their batteries. Also, because the tags are always active, to avoid the tags being heard by the system while in storage, the individual foil pouches should be kept in an RF-shielding sac and not too close to a controller or receiver.
- If the tag battery is okay, check to make sure TLM is turned on with the pocket tag tester.
- To do this, turn the pocket tester on, press and hold ON/ACCEPT button and the UP button simultaneously for 4 to 5 seconds. Once the device is turned on, follow these steps:
Step 1
Once on, you will see Tech Menu displayed on the screen. Press the DOWN arrow one time.
- If you see the User Menu, turn the device off and try again, making sure you are pressing both the up button and the ON button at the same time.
Step 2
The prompt will read TLM Mode.
Step 3
Press the ON/ACCEPT button. This will bring you to the TLM Menu.
Note: If you are unsure and want to check the status, select querying tag from this menu instead. If TLM is already enabled, you will see the tag number and rate 16 seconds displayed on the screen.
Otherwise, continue to step 4 to change the TLM status.
Step 4
Press the UP or DOWN button until TLM ENABLE is displayed.
Step 5
Press the Accept button once and RATE MENU will be displayed.
Step 6
Press the Down button until TLM RATE 16 SEC is displayed.
Step 7
Step 8
The tag tester displays Querying TAG.
Step 9
Hold the tag next to the tag tester until you see the tag number and TLM enabled displayed on the screen. If you wish to enable TLM on multiple tags, press accept and repeat the last step.
What do these tag statuses on the tag inventory list mean?
- “InUse” status – This means the tag is currently assigned to another patient. If this status is incorrect, discharge the patient that the tag was assigned to and re-assign to your new
- “InUseMissing” status – Supervised System ONLY -- This means the tag is assigned to a patient, but the system has not received the regular interval Tag Locate Message (TLM) signal in the unit in which the patient is assigned. Locate the patient and examine the tag. If you feel the tag is not working, replace the tag by discharging first, and then re-admitting it with a new tag.
- “Transfer” status – This means the patient wearing the tag is currently in Transfer mode. If you believe this status is incorrect, check the location of the patient and determine the patient is safe. If the status is incorrect, manually cancel the transfer via the patient functions.
- “Transport” status – This means the patient wearing the tag is currently in Transport mode. If you believe this status is incorrect, check the location of the patient and determine the patient is safe. If the status is incorrect, manually cancel the transport via the patient functions.
- “Dirty” status – STEP Customers ONLY -- This status lets you know which tags are ready to be sent back to McRoberts for service. If the tag you wish to use has a dirty status, choose a different Tag.
- “Low Battery” status – This means the tag can no longer be utilized because the battery power is too low. If you see this status, contact McRoberts Fulfillment department at 1-800-776-7328 option 3.
- “Locked” status – This means that a user on a different console is in the process of assigning that tag to a patient. Once that process is complete, the tag status will change to “InUse.” If the process is cancelled, the tag status will change to “Available.” If you are certain that no one else is assigning that tag to a patient, and therefore the locked status is incorrect, call McRoberts Technologies and ask that the tag’s status be reset to “Available.”
The tag is assigned to my patient, but it is not being detected at the door.
- If a tag is not detected at a door, “STOP!” Do not use the tag until it is determined if the door controller or the tag is the reason the tag was not detected. To do this, follow the below steps:
- Use the Pocket Tag Tester to test the tag. If it fails the test, replace the tag with another one.
- If the tag battery tests OK, use a second tag and check to see if that tag is seen at the door. If the second tag is not detected at the door, call McRoberts Technologies. The technician may ask if someone (i.e., Biomed, Facilities Engineer, etc.) can assist with troubleshooting. Normally, we ask if the power on the door controller can be recycled. Recycling power on the door controller resets it and often the door controller functions properly after the reset.