Tag Management
- How To: Disinfect Tags
- STEP Program
- How To: Store and Test Tags
- Unable to Assign a Tag to a Patient - Troubleshooting
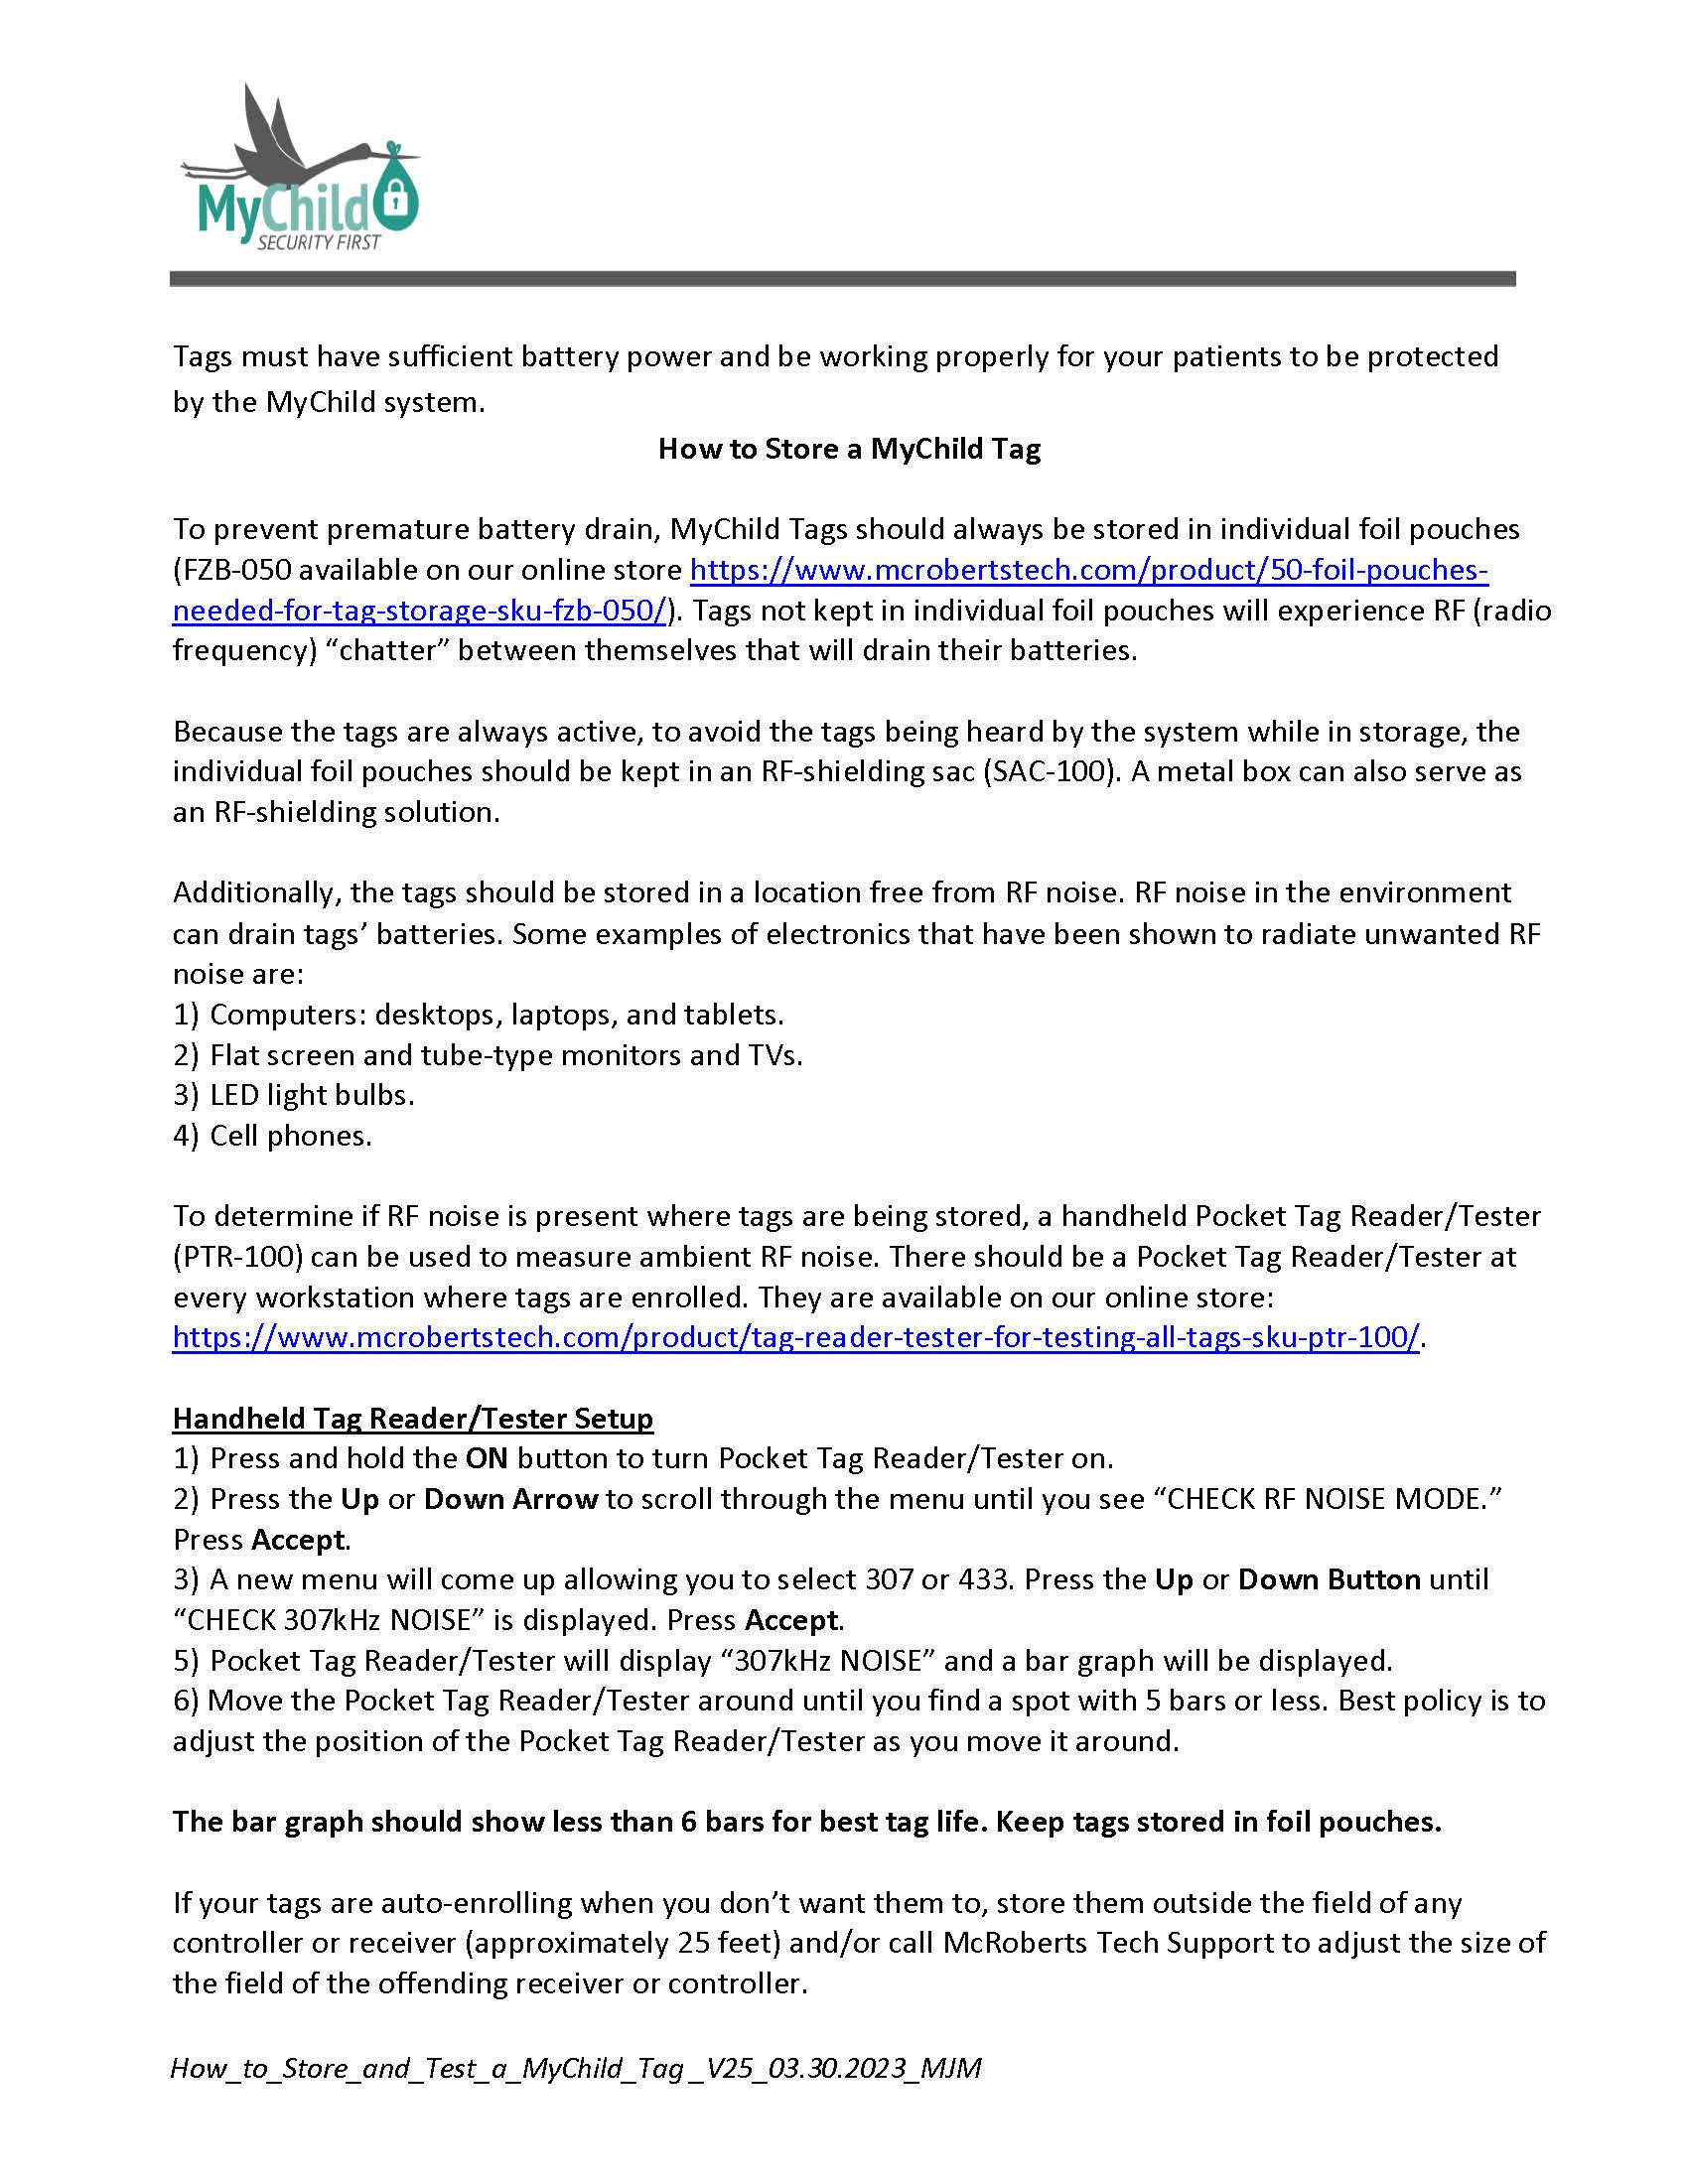
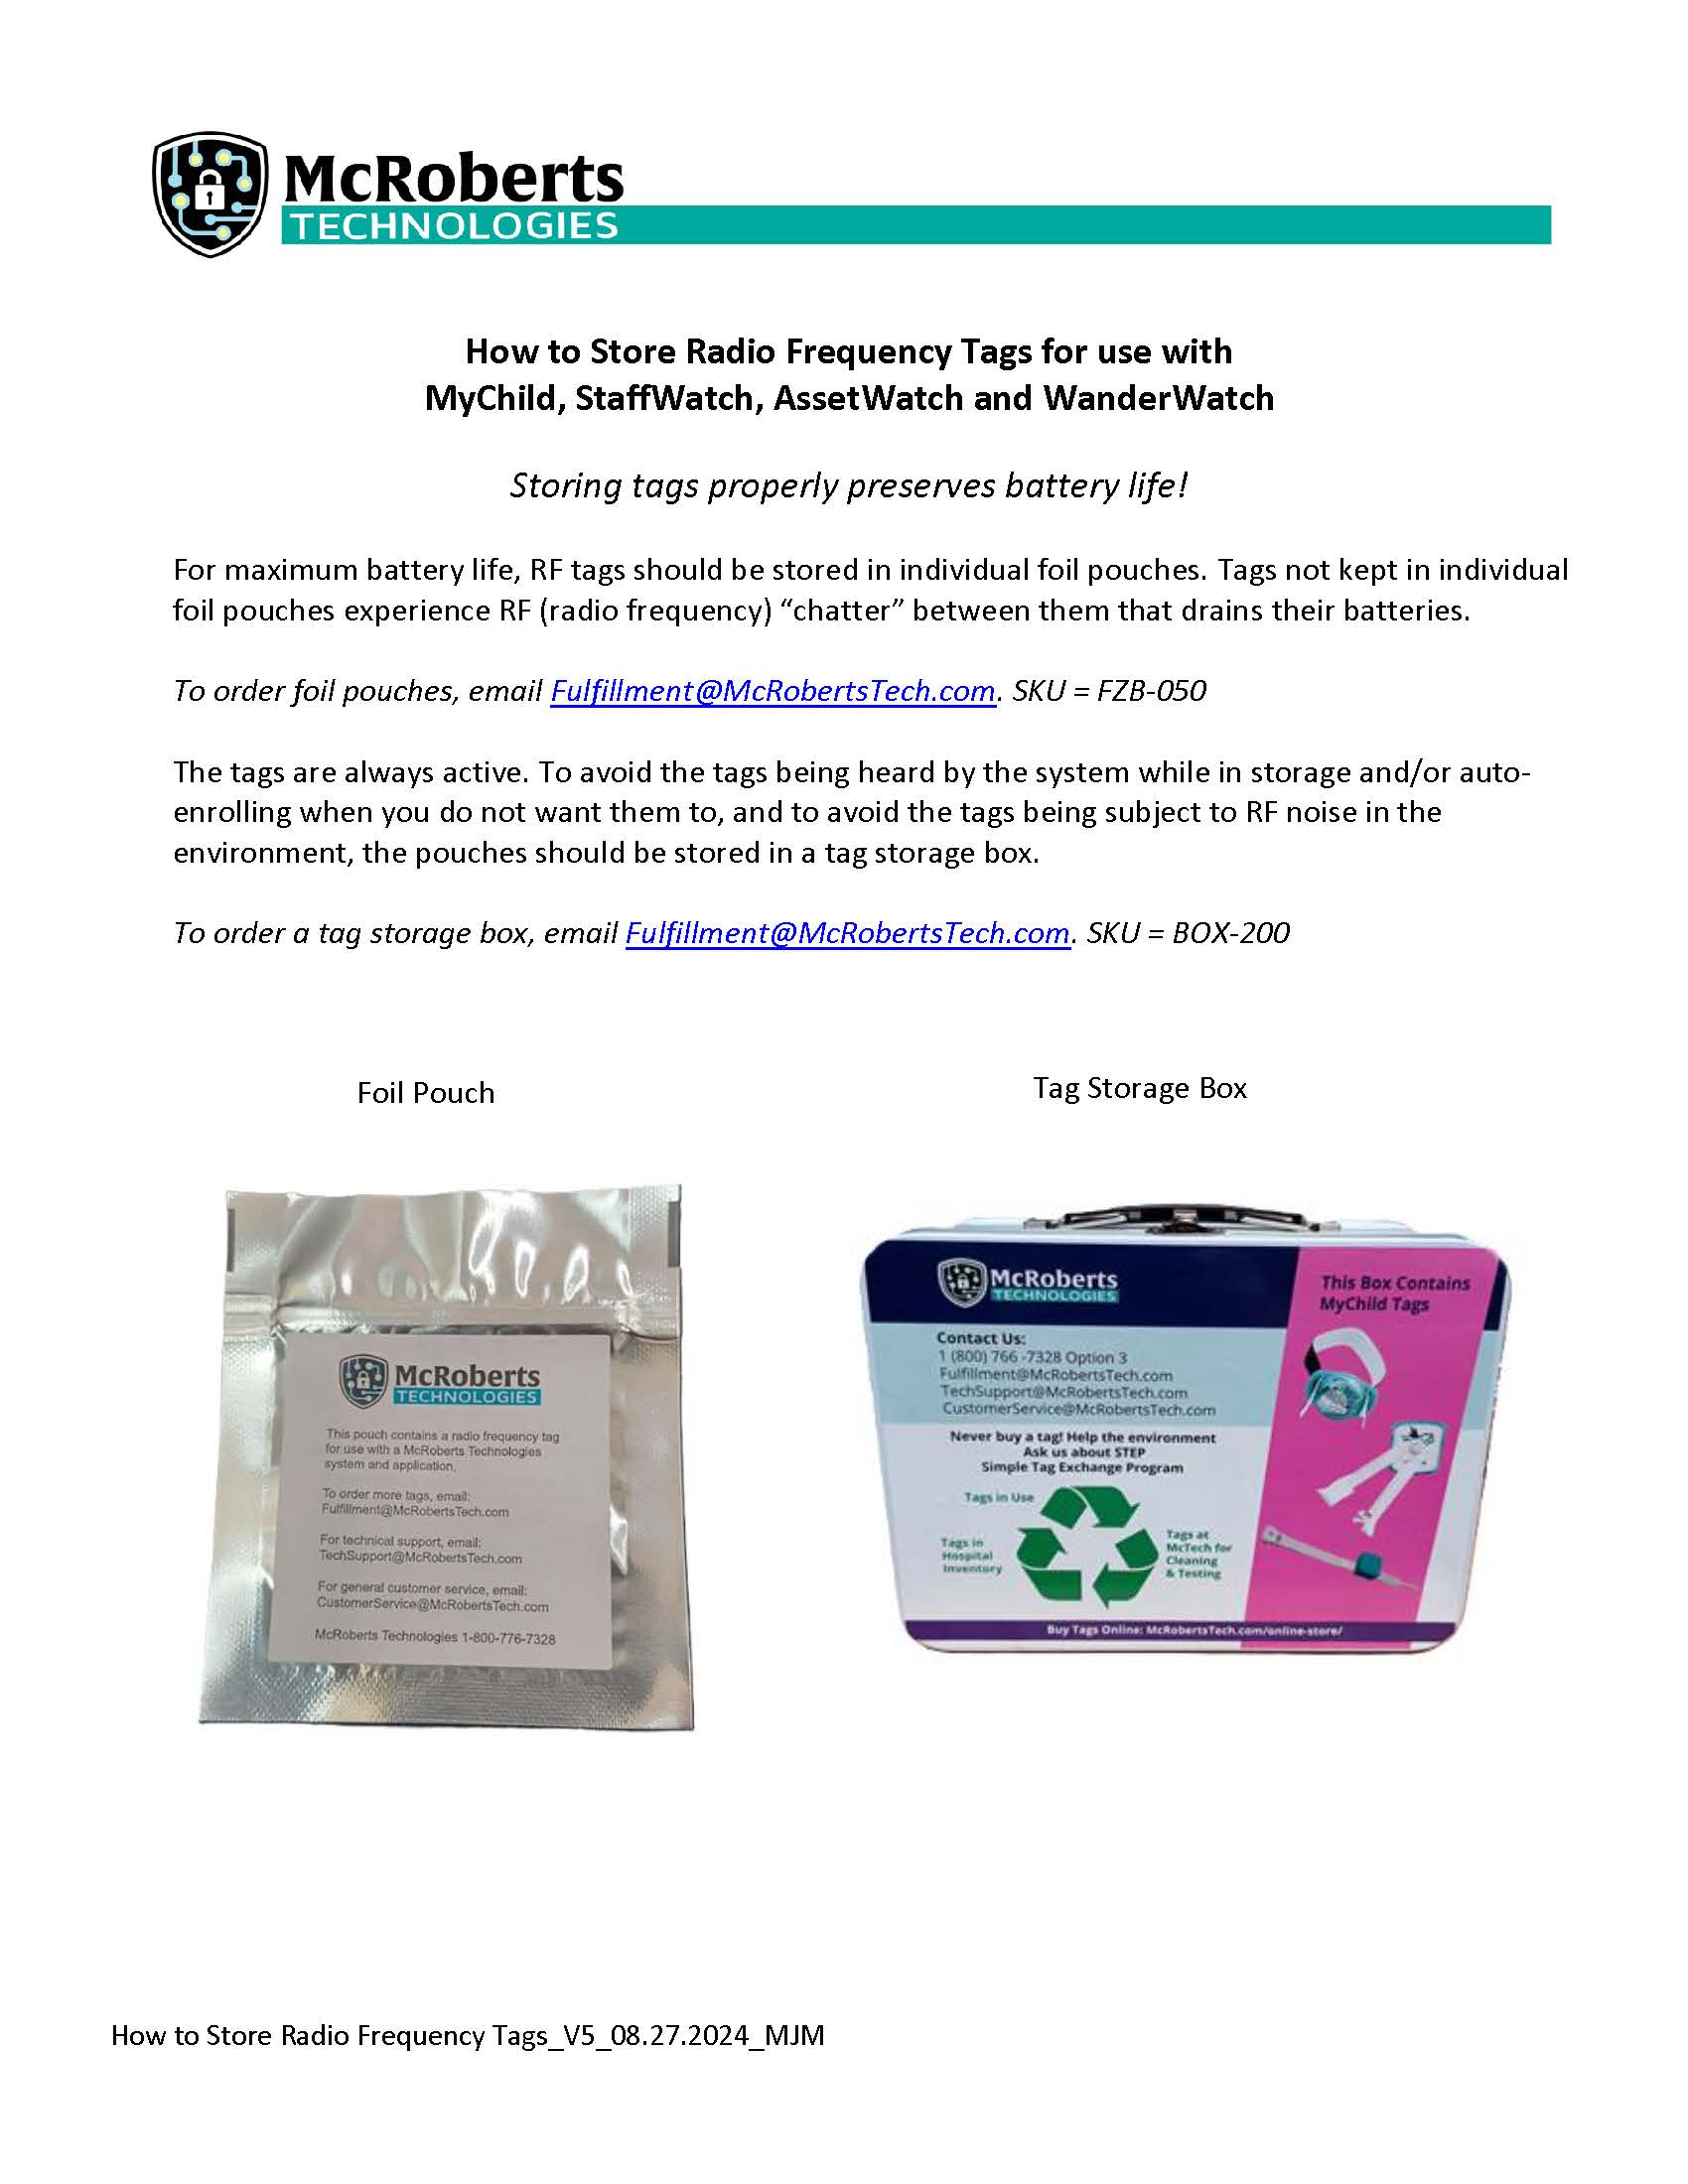
- How to: Store Radio Frequency Tags
- Tag Warranty/Buy-Back
How To: Disinfect Tags
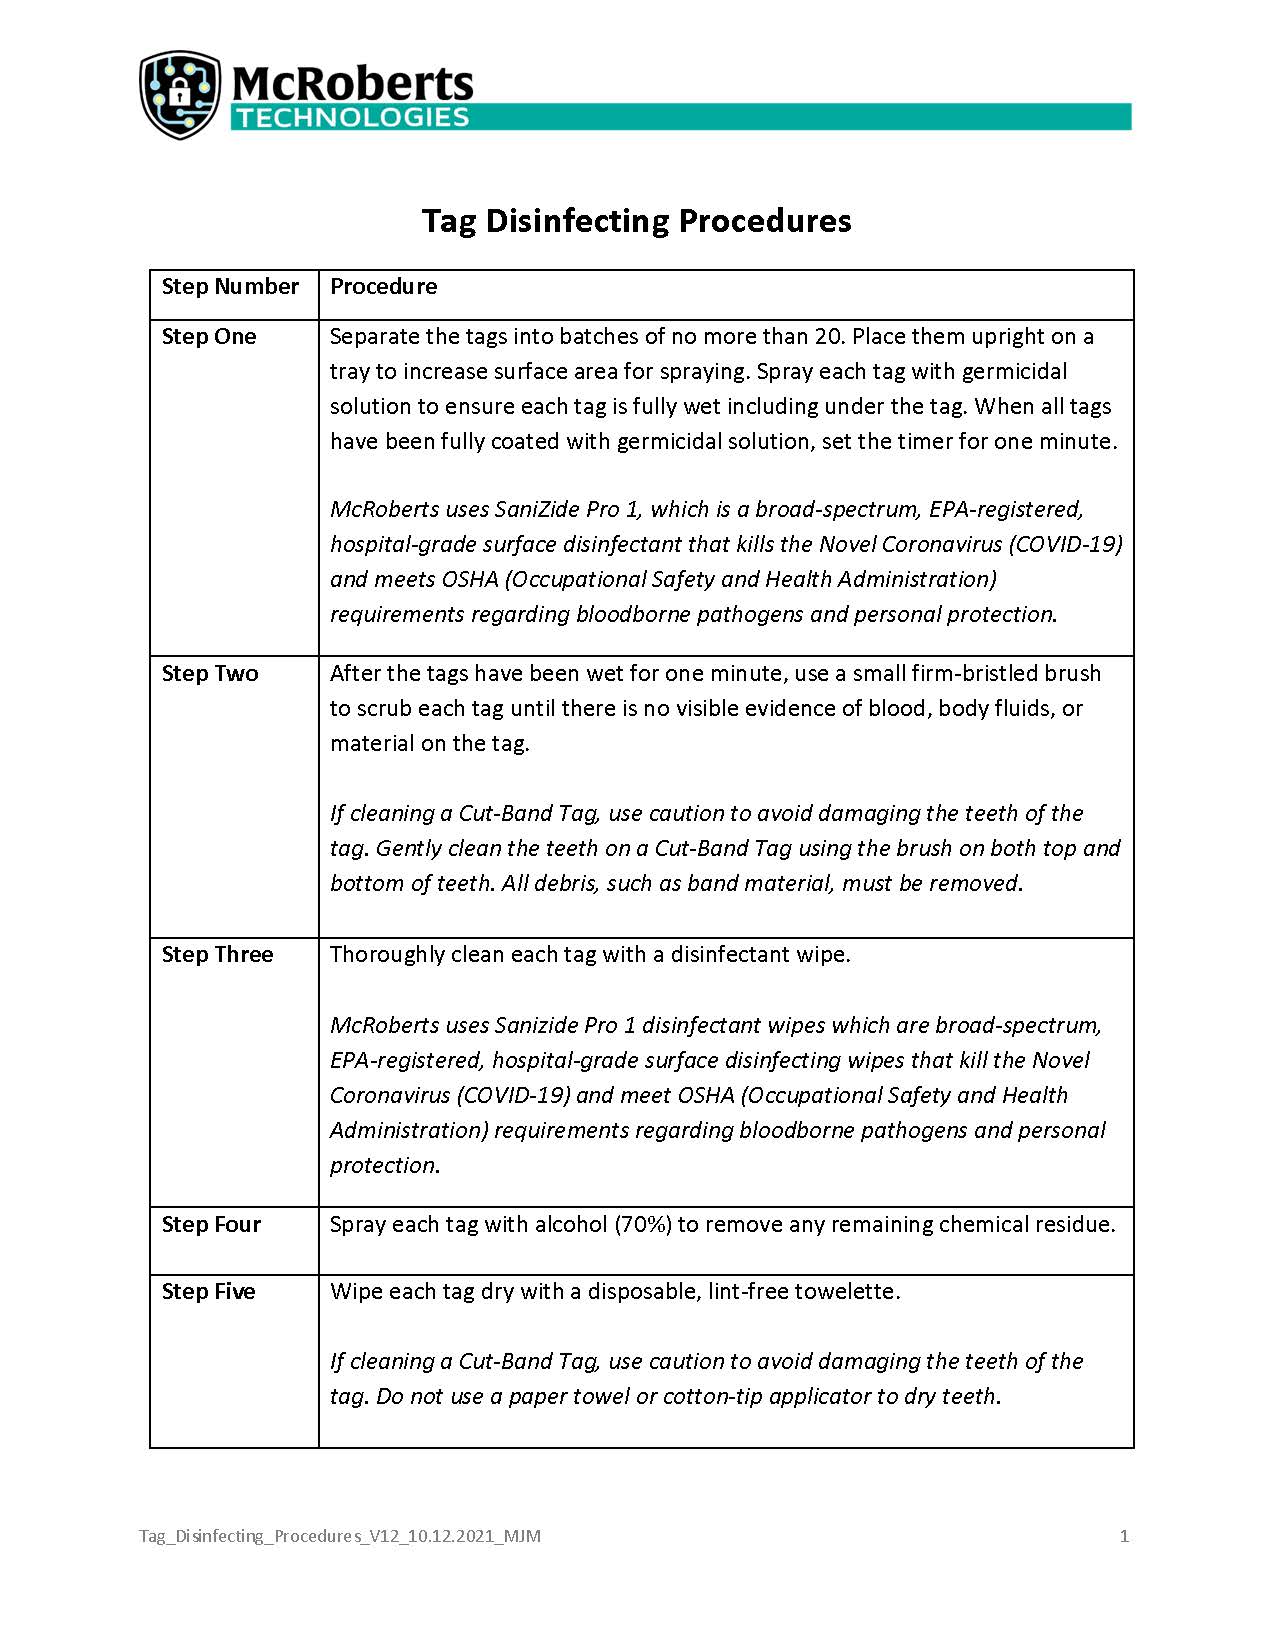 Tag Disinfecting Procedures PDF
STEP Program
STEP – Simple Tag Exchange Program
Never buy a tag! Let McRoberts manage your tags for you.
STEP is a program in which McRoberts manages your tag inventory, testing and disinfecting and provides
tags for per-patient use with the MyChild infant protection system. You use tags once then return them
to McRoberts for testing and disinfection on a weekly basis. STEP integrates seamlessly with clinical
practices and relieves hospitals from the burden of cleaning tags, managing inventory, and the
purchasing process when tags expire.
The birth census of each hospital determines the number of tags that are assigned to a hospital’s Total
Tag Population. The initial shipment of tags to the hospital contains a three-week supply. Each week the
hospital sends its dirty tags to McRoberts and McRoberts ships back the same number of tested and
disinfected tags. The program is designed so that at any time, a third of the tags are in use, a third are in
the hospital’s inventory and a third are in transit or in cleaning.
The foil pouches that the tags come in should be kept and used to send dirty tags back to McRoberts in
order to preserve their battery life and get them off the protected unit without alarming.
Already own your tags? McRoberts will give a $30 per-tag credit for tags that are not dead or have a low
battery. McRoberts will also always take back any dead tag for proper disposal.
The STEP contract is for twelve months and invoicing is monthly, based on anticipated birth census.
Clients who opt to pay for the entire twelve months in advance enjoy a ten percent discount.
Click Here to download the PDF
For questions about the STEP Program, contact Tag Fulfillment at 800.776.7328, Extension 2104 or
Fulfillment@McRobertsTech.Com.
How To: Store and Test Tags
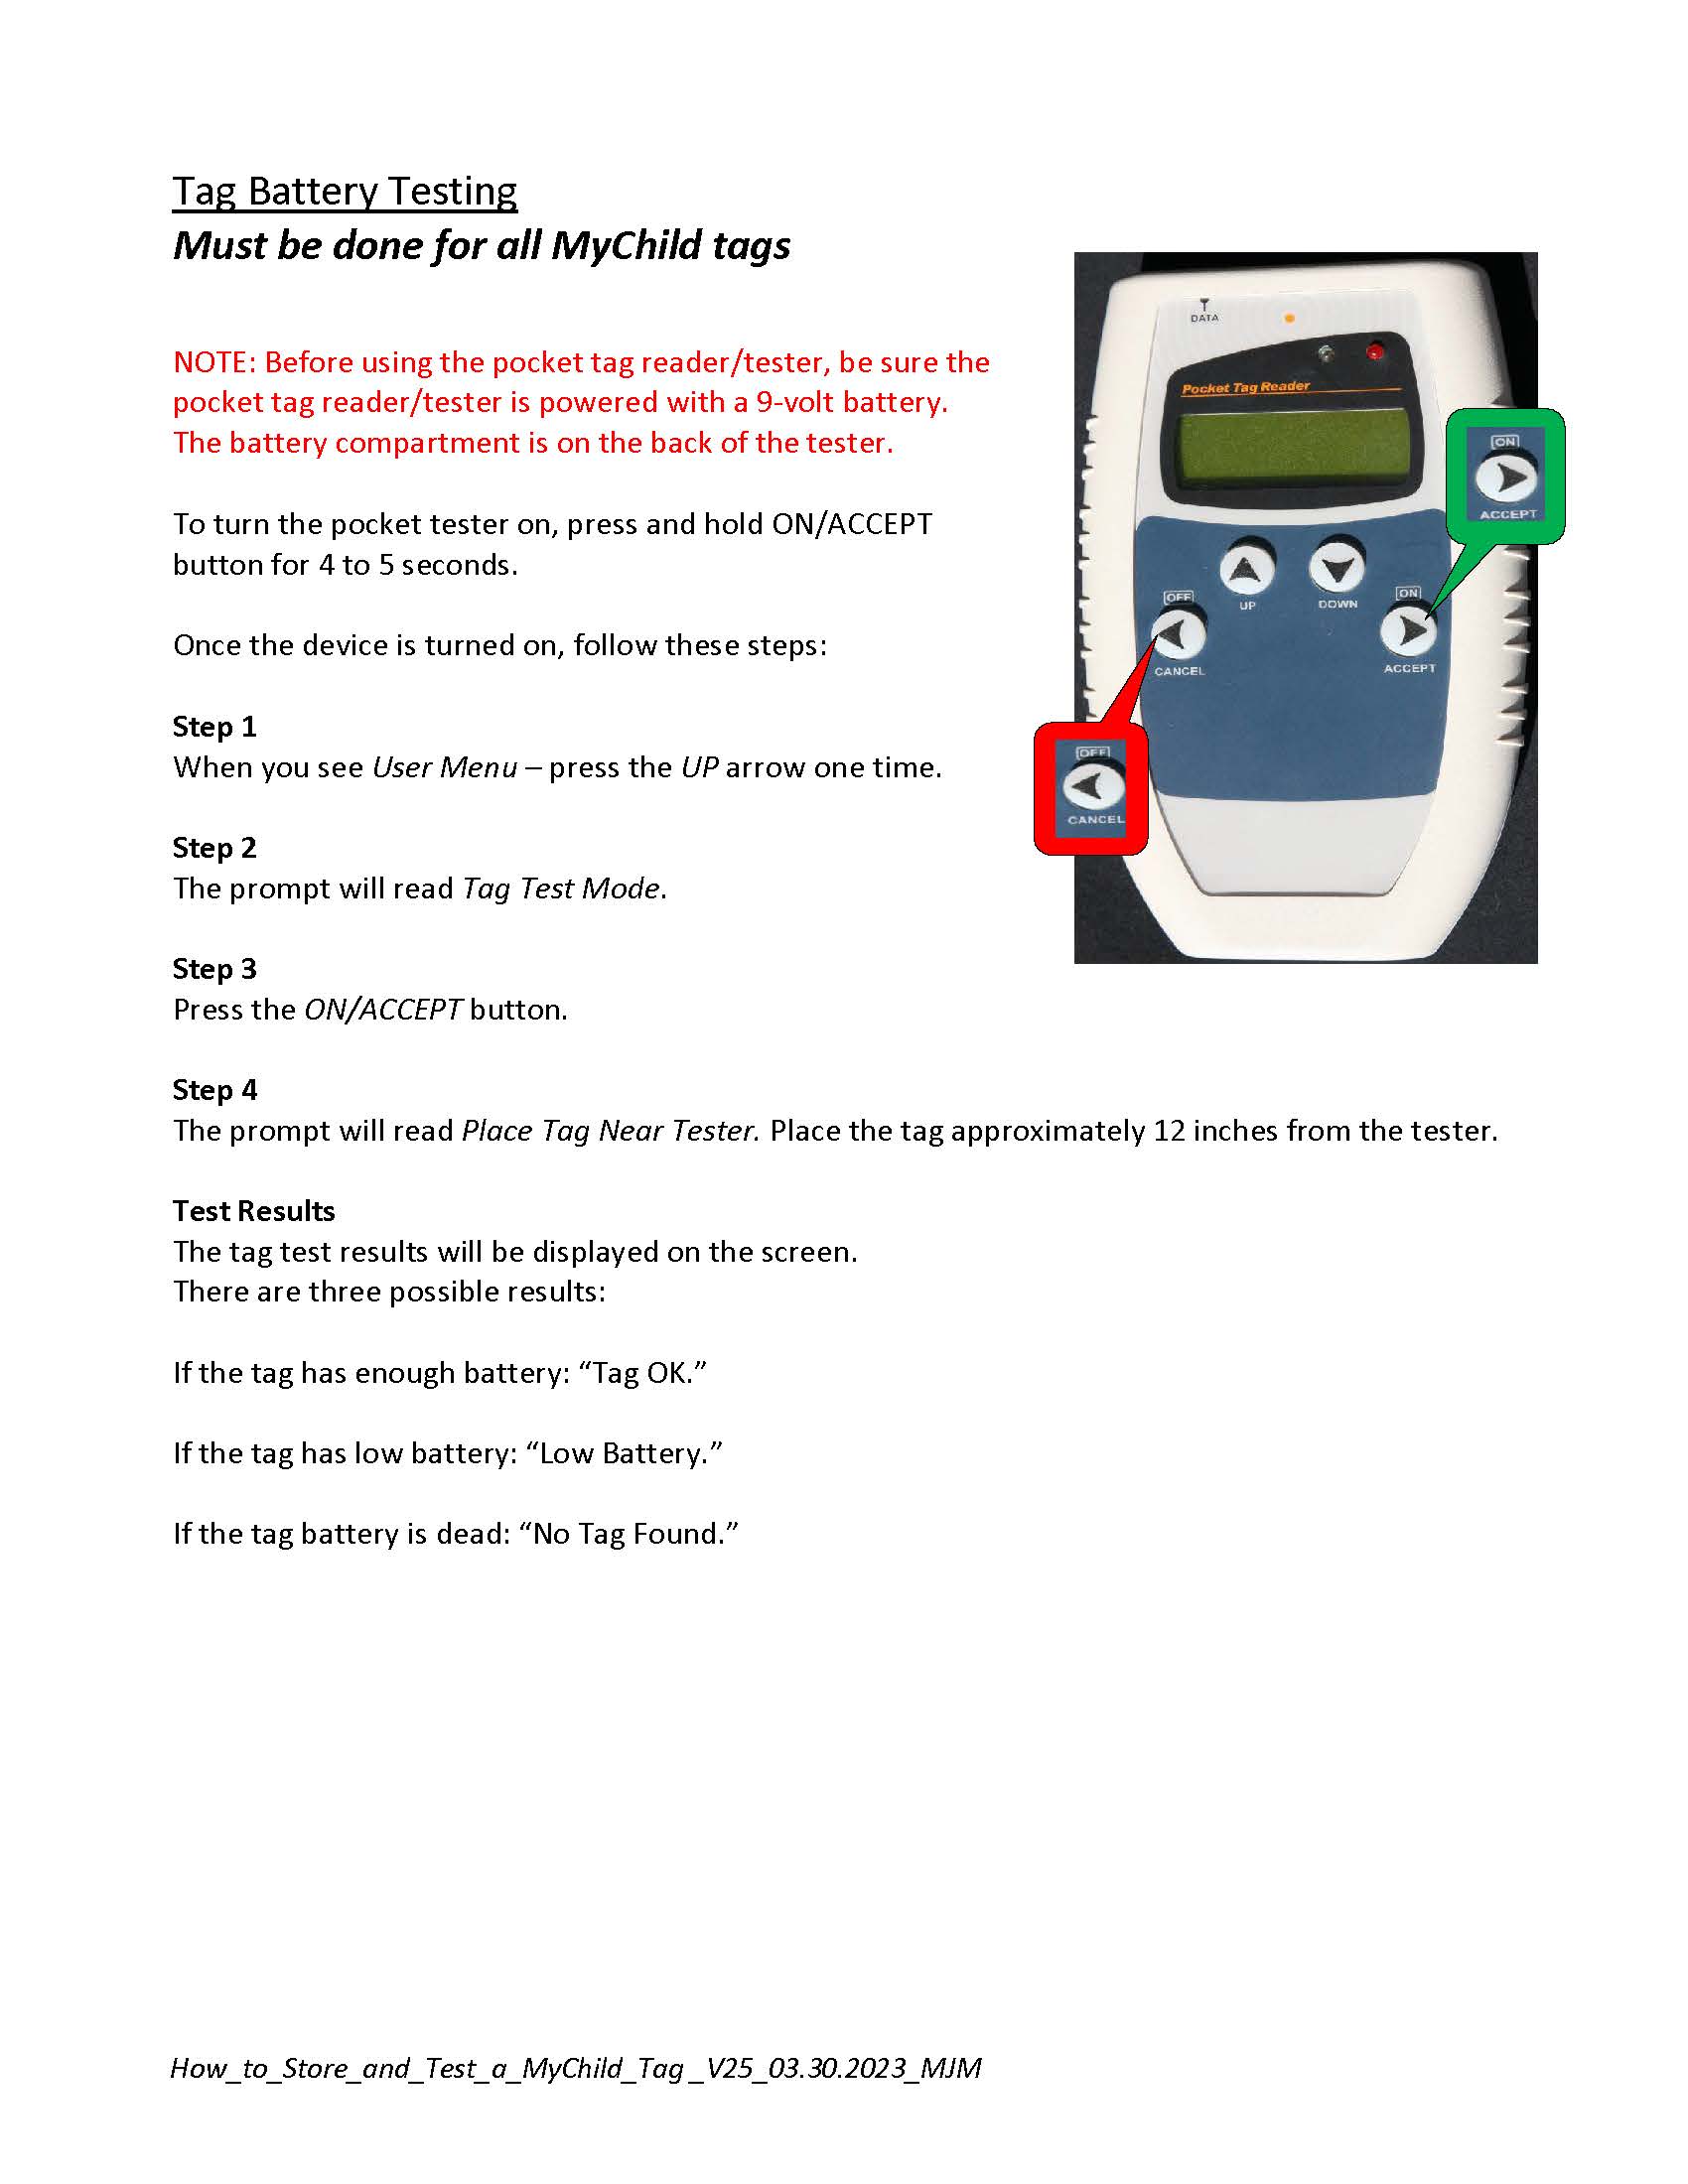
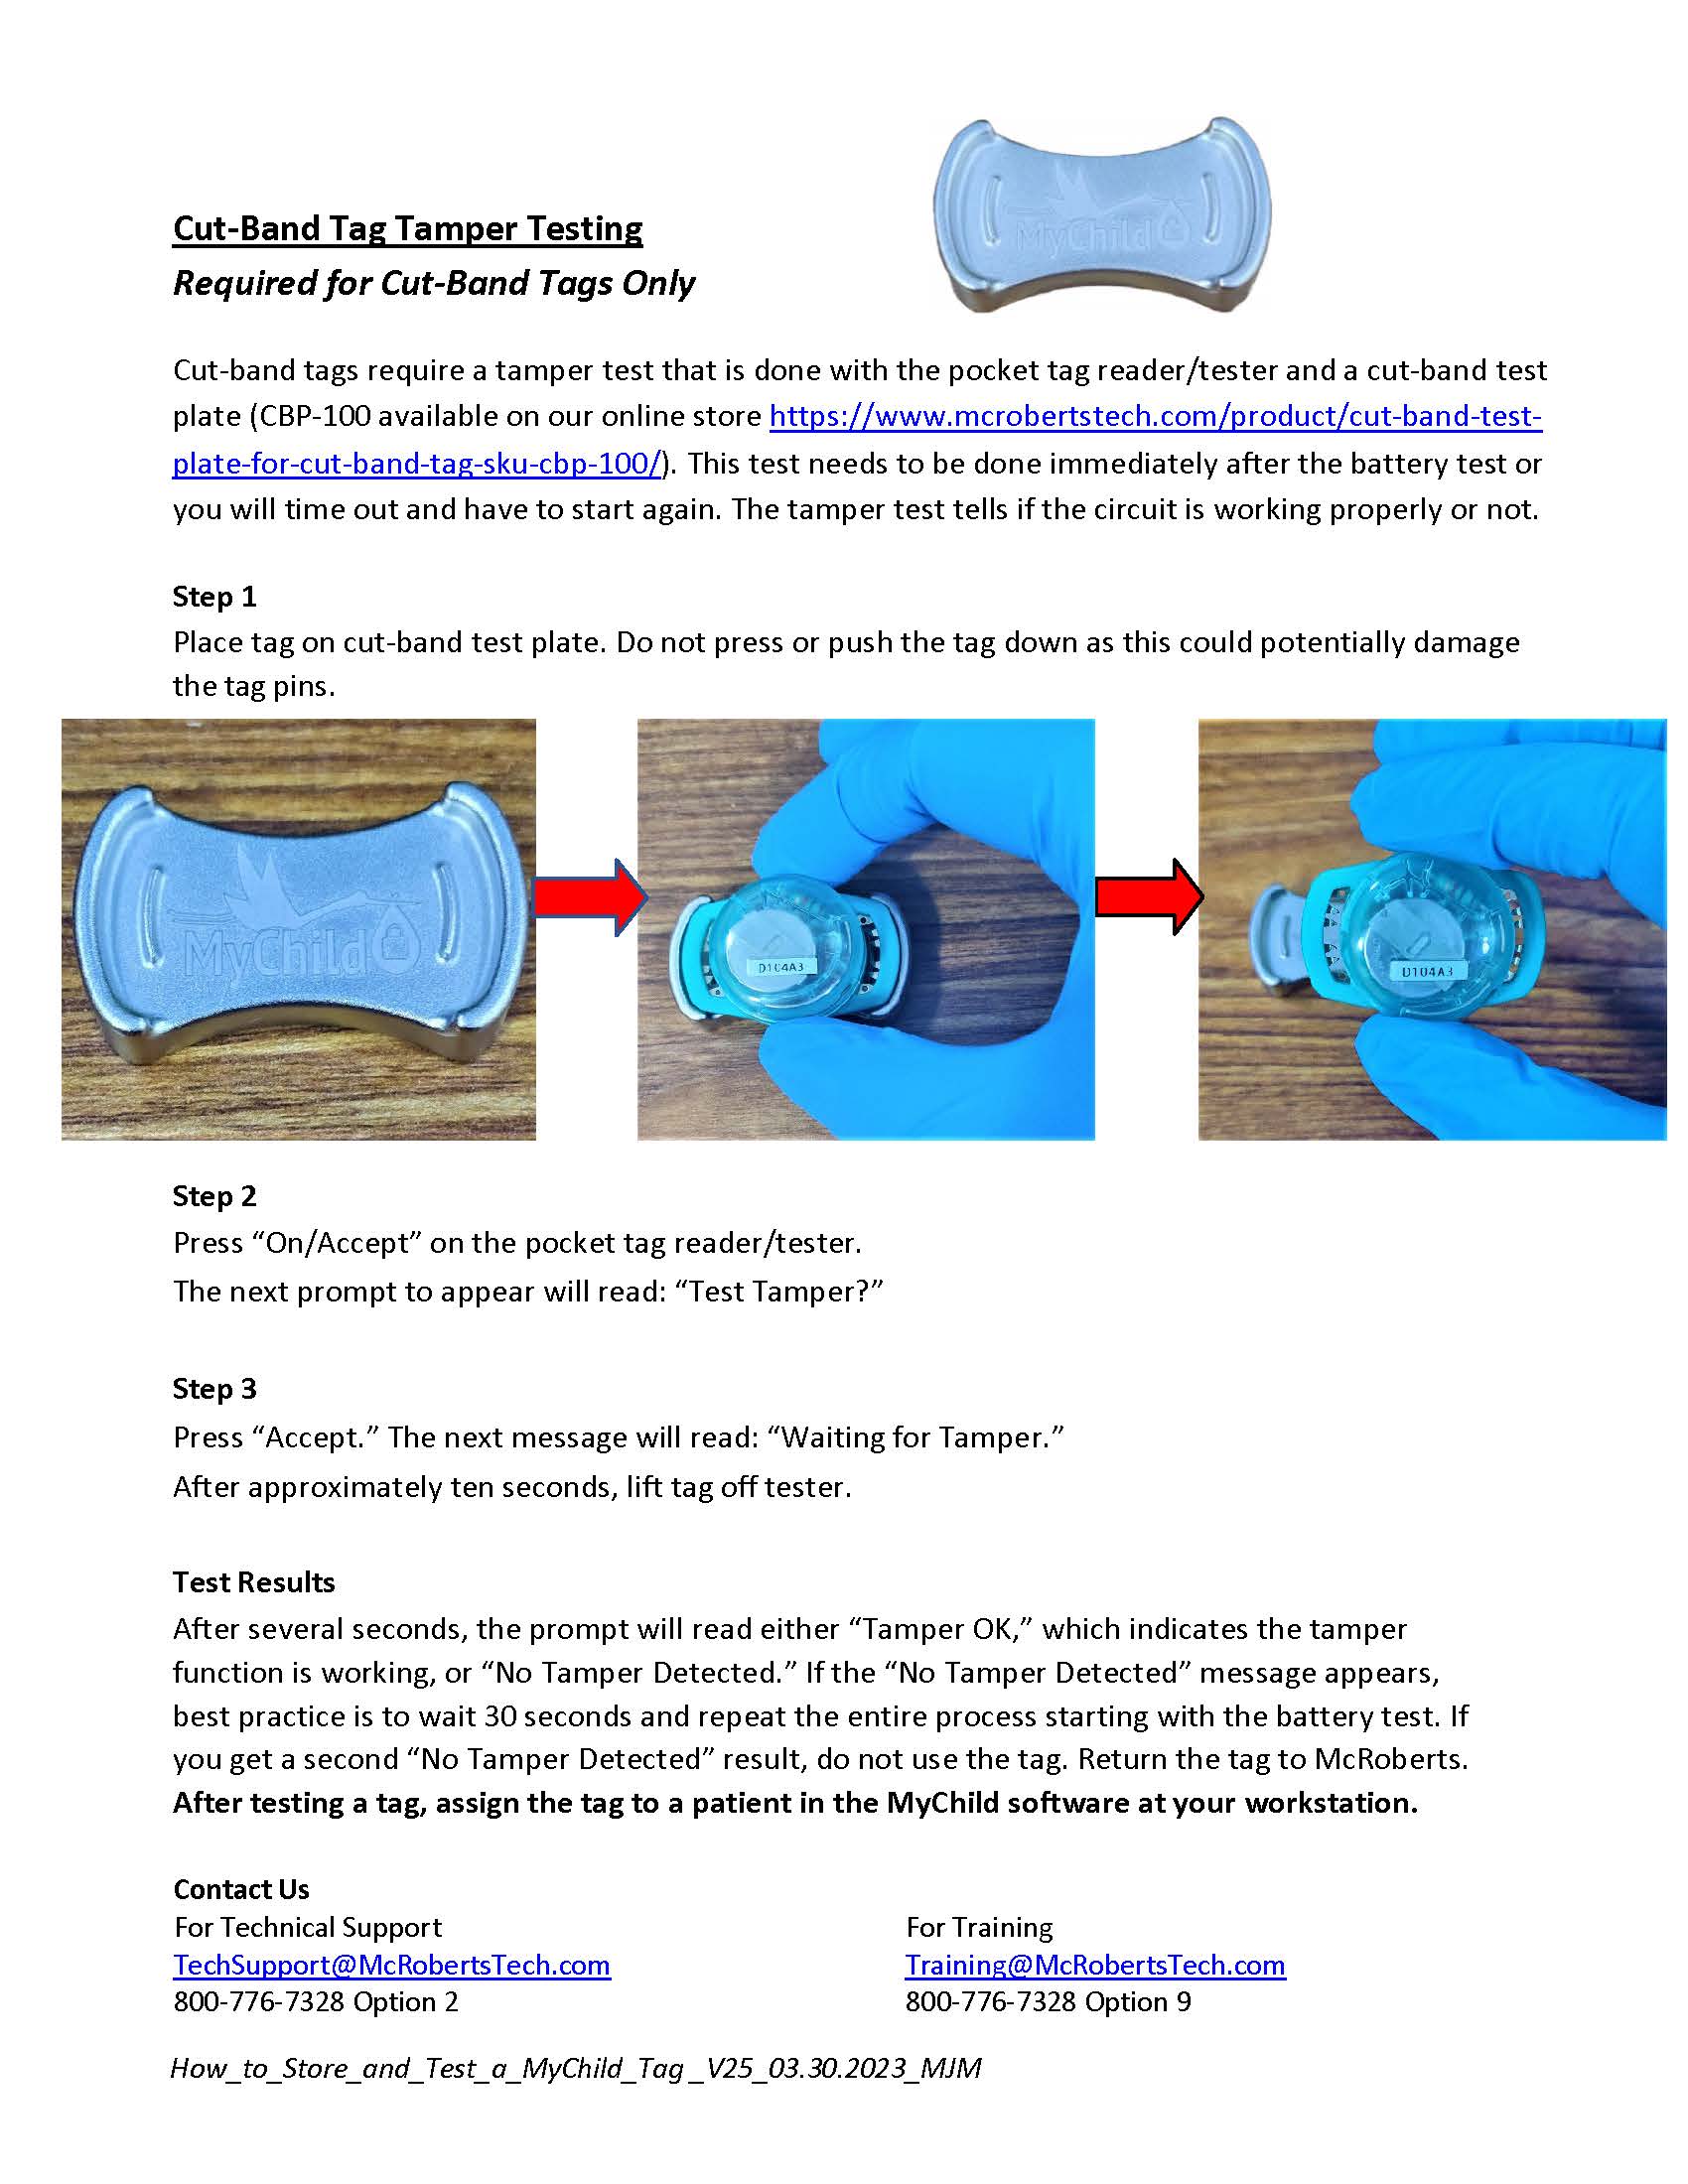 After testing a tag, you can assign the tag to a patient at your workstation.
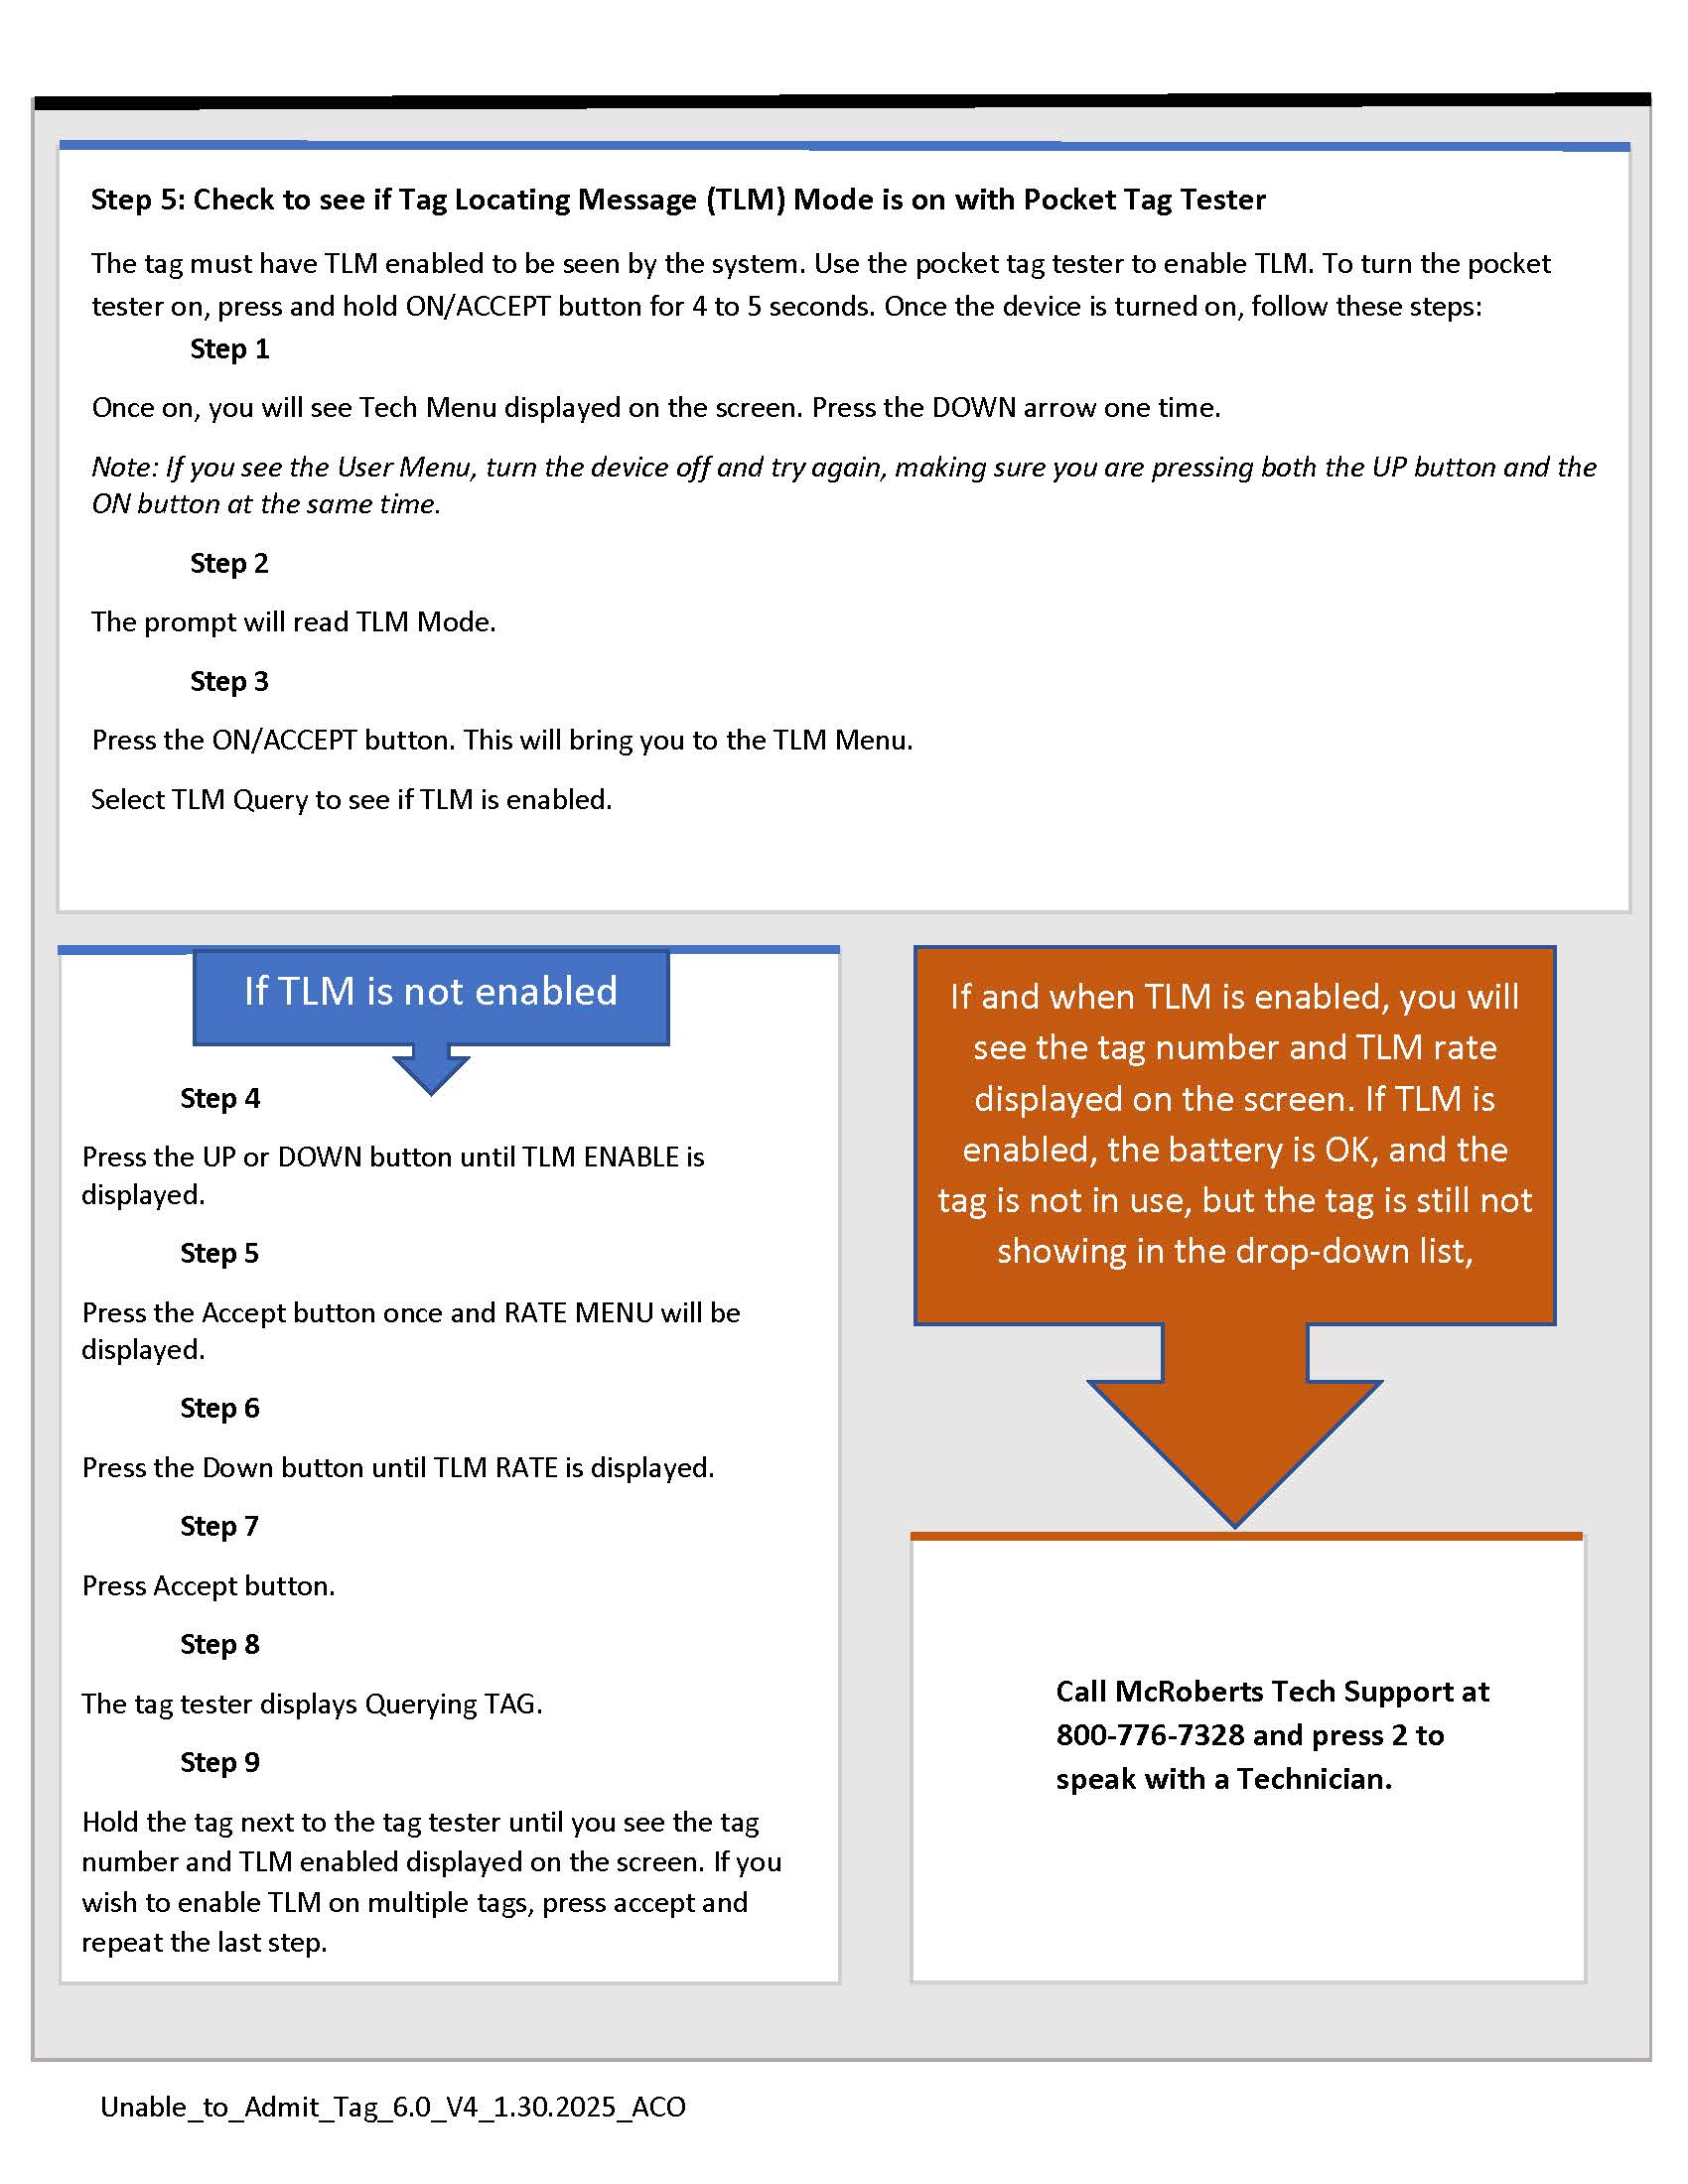
TLM Testing
The pocket tag tester can also be used to test and change the TLM mode.
To turn the pocket tester on, press and hold ON/ACCEPT button and the UP button simultaneously for 4 to 5 seconds. Once the device is turned on, follow these steps:
Step 1
You will see Tech Menu. Press the DOWN arrow one time.
*If you see the User Menu. Turn the device off and try again, making sure you are pressing both the up button and the ON button.
Step 2
The prompt will read TLM Mode.
Step 3
Press the ON/ACCEPT button. This will bring you to the TLM Menu.
Step 4
Press the UP or DOWN button until TLM ENABLE is displayed.
Step 5
Press the Accept button once and RATE MENU will be displayed.
Step 6
Press the Down button until TLM RATE 16 SEC is displayed.
Step 7
Step 8
The tag tester displays Querying TAG.
Step 9
Hold the tag next to the tag tester to change the TLM mode to be “enabled.”
If successful, the HH will display the Tag’s ID and TLM Enabled
Make sure there is only one tag at a time near the pocket tag tester while turning on TLM.
Contact Us
For Technical support For customer service
TechSupport@McRobertsTech.com CustomerService@McRobertsTech.com
800-776-7328 Option 2 800-776-7328 Option 8
Download How to Store and Test Tags
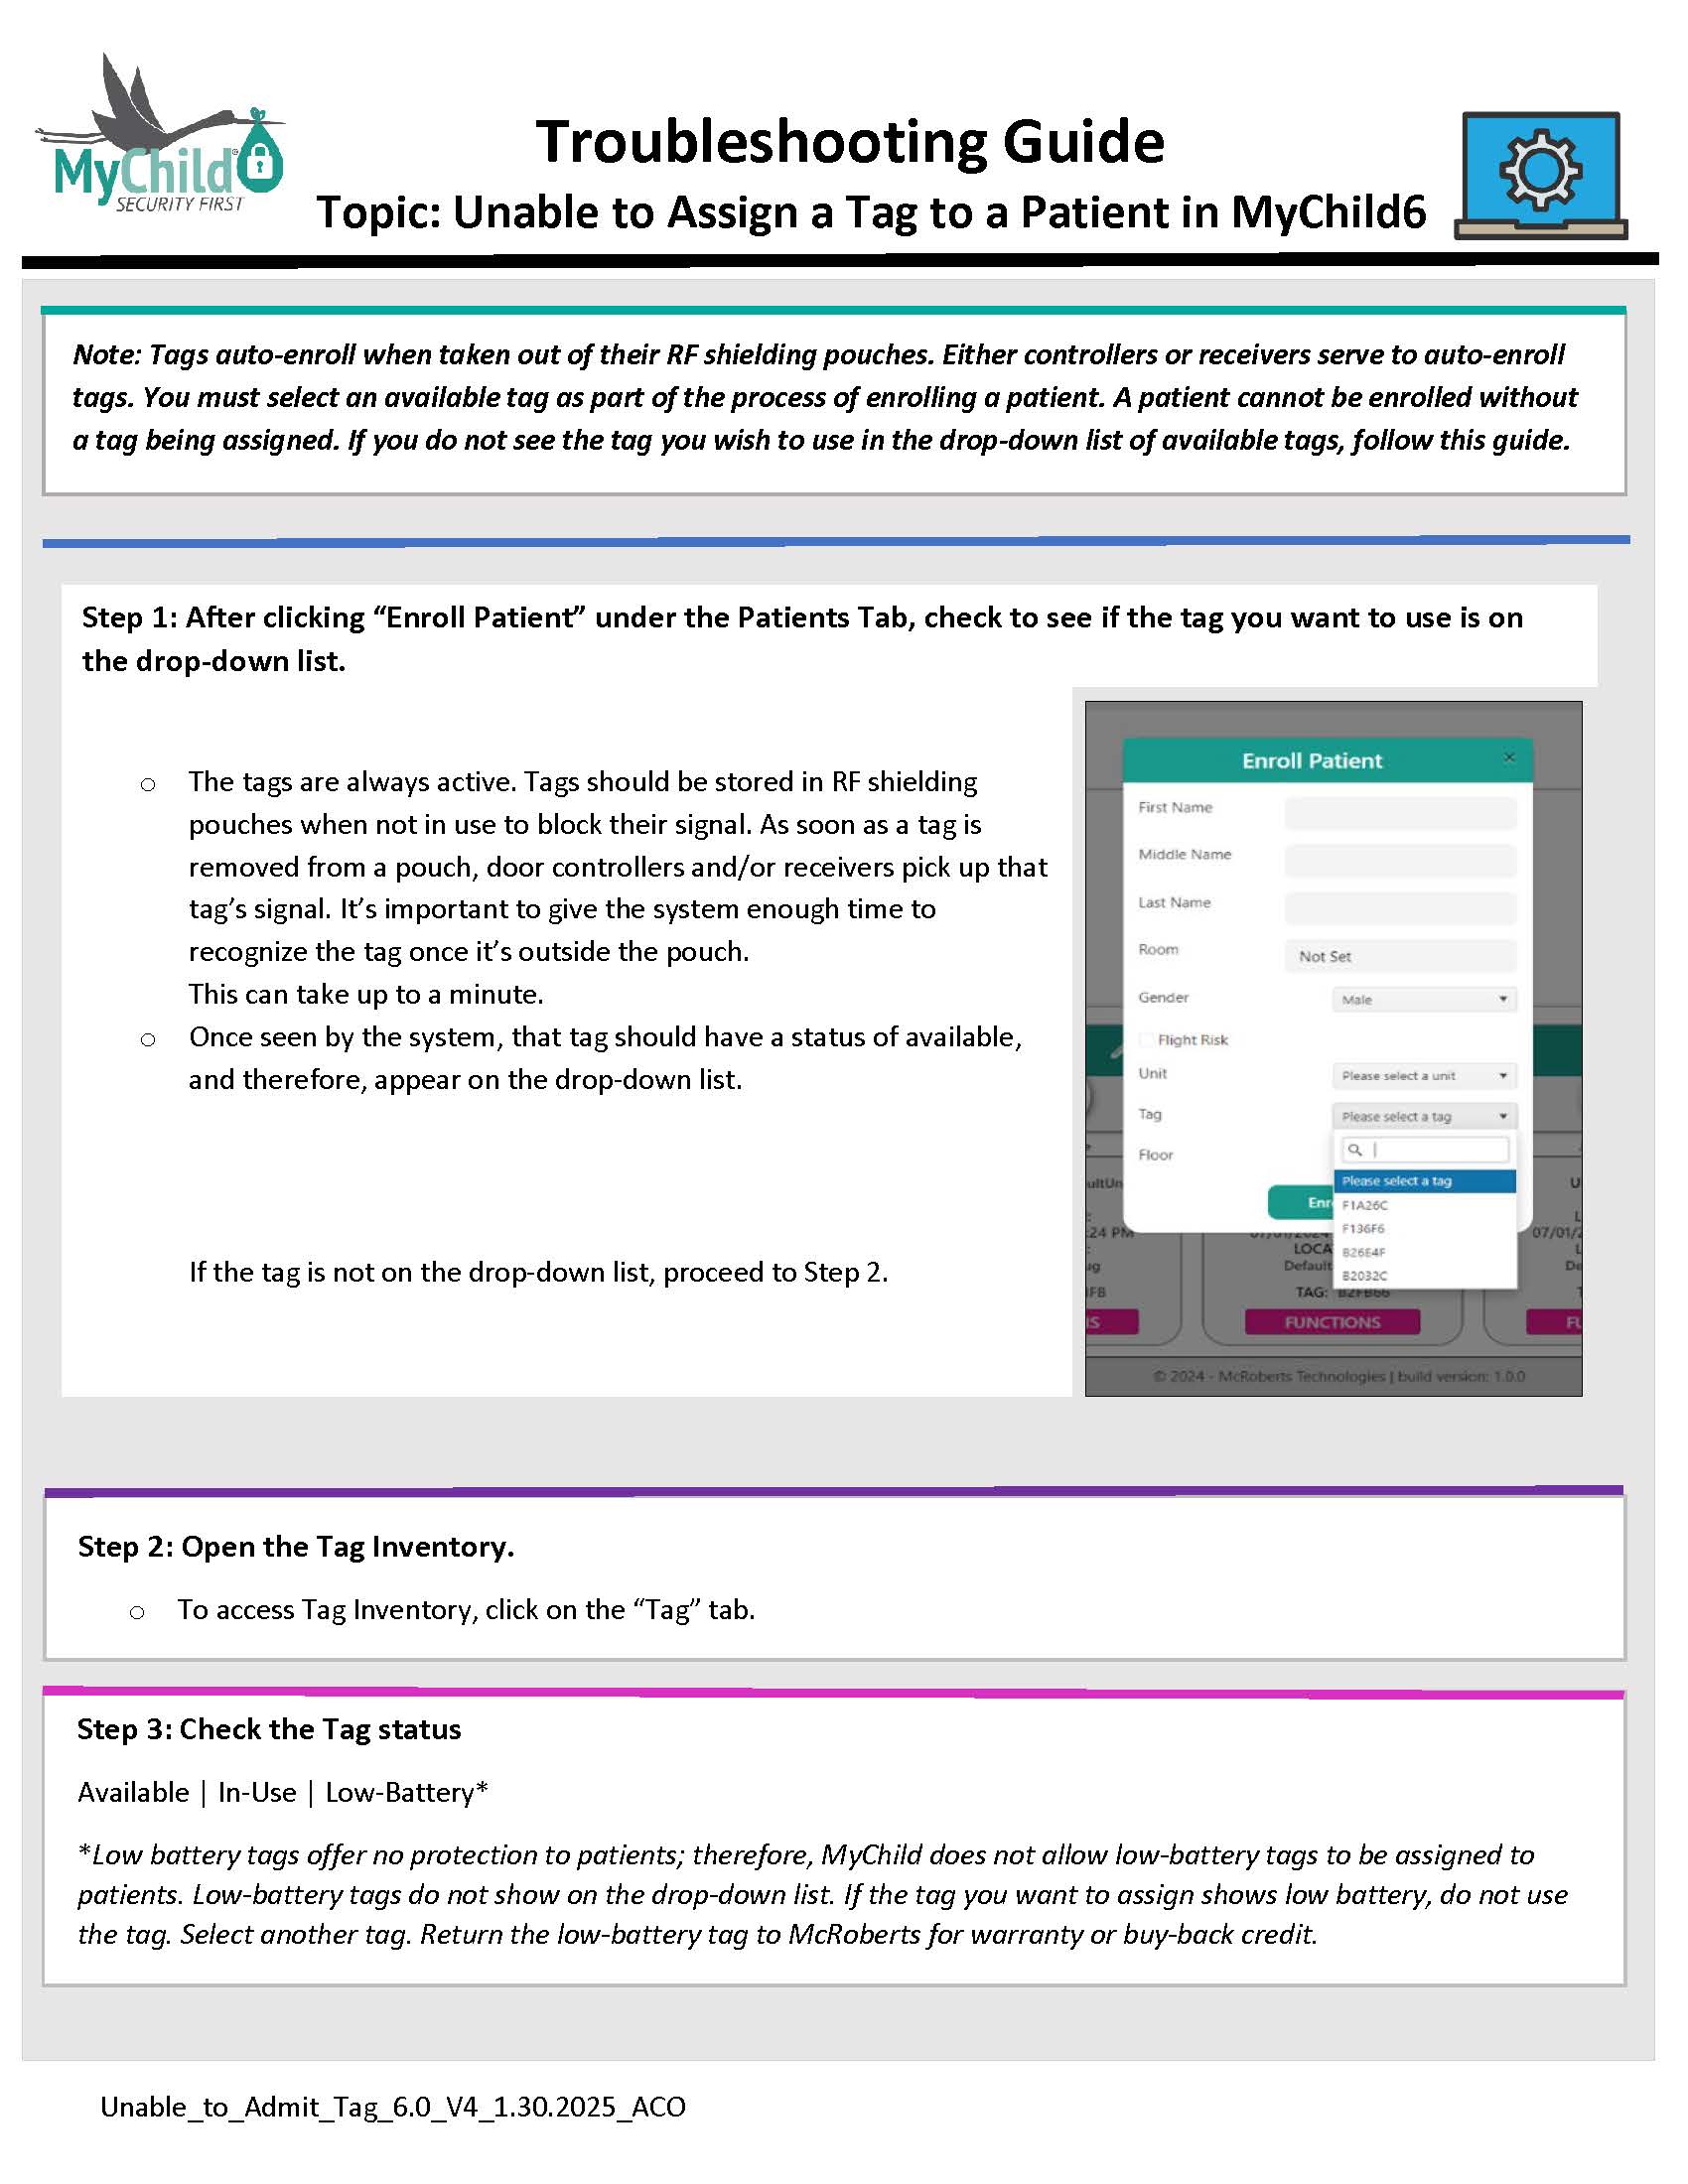
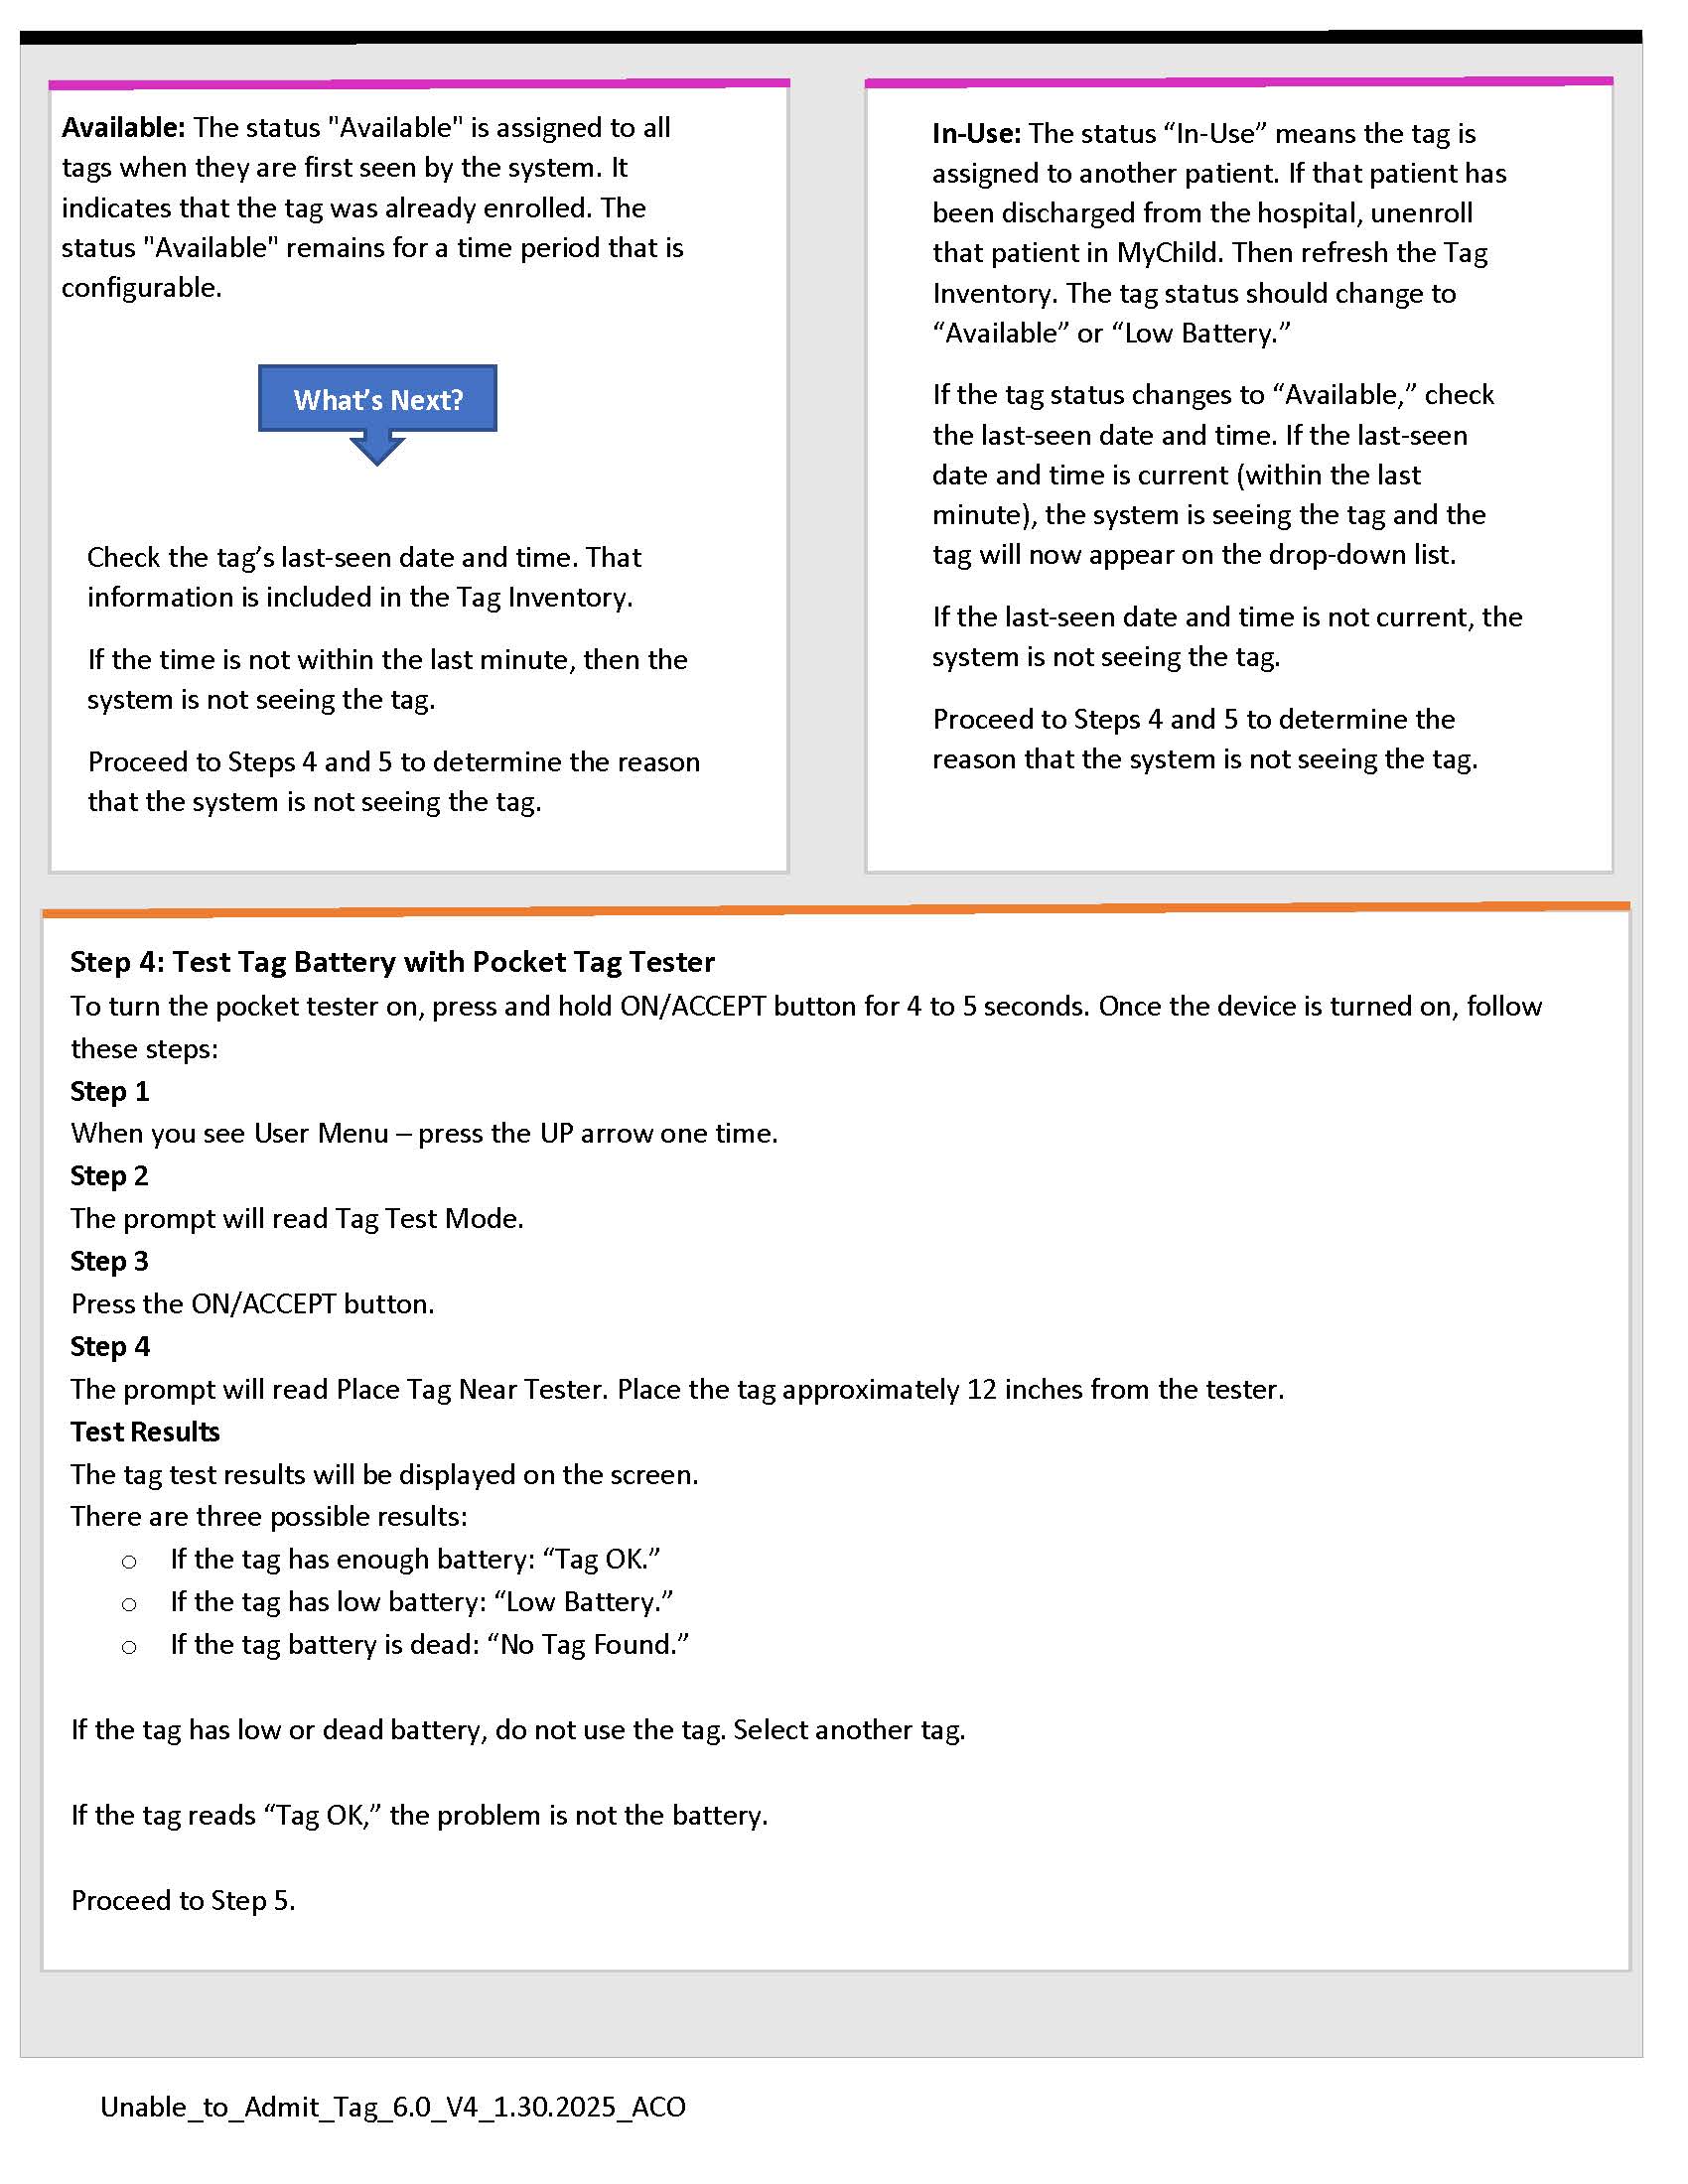
Unable to Assign a Tag to a Patient - Troubleshooting
How to: Store Radio Frequency Tags
Tag Warranty/Buy-Back