Install
- Deployment Without Docker
- Deployment using Docker Desktop / Docker CLI
- Microsoft SQL Server Deployment Guide
- Microsoft SQL Management Studio Deployment Guide
- RabbitMQ Deployment Guide
- Deploying the Relay Controller without Docker
- Installing the MyChild6 Desktop Application
Deployment Without Docker
Required Software:
- Windows Server 2019 or newer (Windows Server 2022 preferred)
- .NET 8 Runtime
Required Services:
- Microsoft SQL Server 2019 or newer
- RabbitMQ 4.2x
Optional Software/Services:
- Redis
- InfluxDb
This guide assumes you are working with a new install of windows server and the client has not provided any of the services needed by MyChild6
File Install
Start by installing the following software in the order they are listed below
- Chocolatey - Install Guide
- Microsoft SQL Server - Install Guide
- SQL Management studio - Install Guide
- RabbitMQ - Install Guide
- .NET 6 Runtime (download here)
Once all of the software dependencies are deployed, you can then start deploying the MyChild6 software.
1. Download the deployment zip file to the server (This can be downloaded from Gitlab currently)
2. Unzip the deployment zip file to c:\temp
3. Create the main program directory C:\Program Files\McRoberts Technologies\MyChild6_Web
4. Create the main directory for the McLink Agent (If required) C:\Program Files\McRoberts Technologies\MyChild6_McLinkAgent
5. Copy all files from the unzipped deployment file to the folder created in step 3
At this point the MyChild6 software is now deployed.
The next step is to install the MyChild6 Services. Follow the steps below.
Service Install
Inside the main service folder (IE: C:\path\to\MyChild6_Web\helper_scripts\installers for MyChild6) there should be a file named "install-service.ps1" this is a PowerShell script that should install the MyChild6 Web Service, to run it you will need to move the file to the same folder as the MSTWatch.Web.exe file (IE: the folder created in Step 3 above), once completed you can then double click on the file using windows explorer, or you can run the script from an Elevated PowerShell (IE: Run as Administrator).
The McLink Agent service should also have an installer file name "install-mclinkagent-service.ps1" that behaves exactly the same way as the MyChild6 Web Installer, you will find it in the C:\path\from\step\4\helper_scripts\installers copy it to the path from step 4 and execute it by double clicking on it, or running it from an Elevated PowerShell (IE: Run as Administrator).
Now you have successfully deployed the MyChild6 software to your server.
The next step is to configure and start the services. Please visit the Configuration guide for more information
Deployment using Docker Desktop / Docker CLI
Microsoft SQL Server Deployment Guide
Finding the Installer
To begin this installation please navigate to the File Explorer on the server in question by either selecting the File Explorer icon on the Task Bar as shown below:
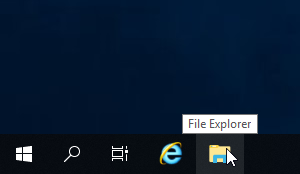
Or by right clicking the Start Menu (Windows icon) on the task bar as shown below:

You will then need to navigate to This PC (Found in the Quick Access Menu on the left in the File Explorer) > Local Disk (C:) >temp
Or C:\temp.
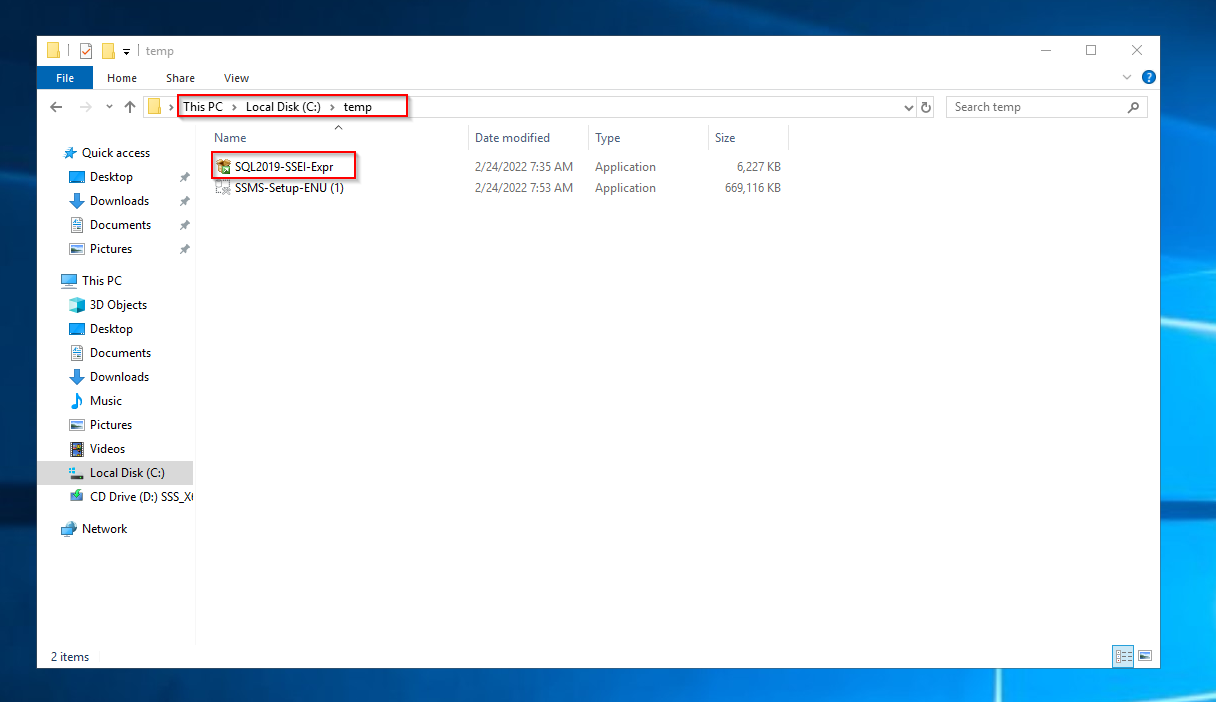
You will then select the SQL2019-SSEI-Expr application and double click it.
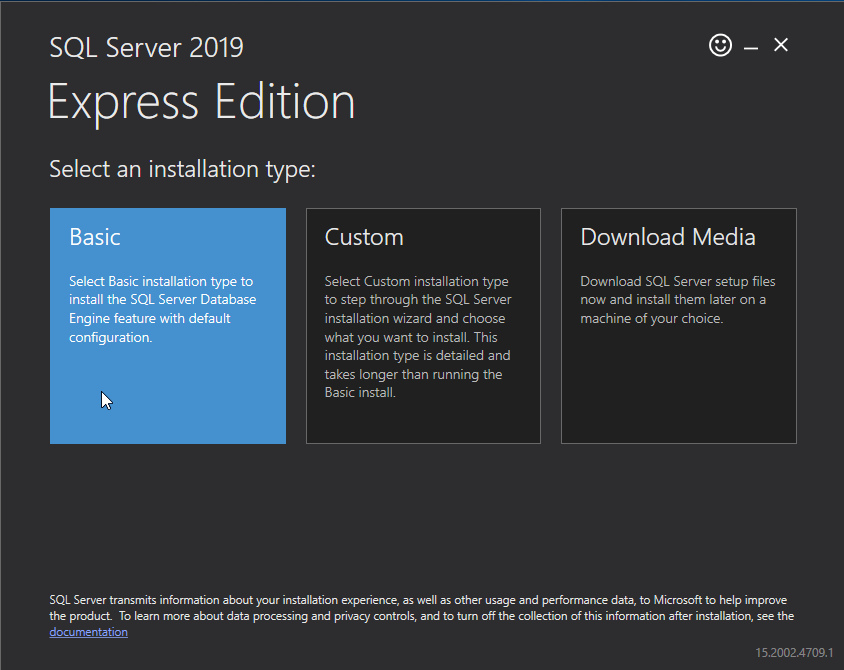
Selecting the Installation Type
Please select the Basic installation option.
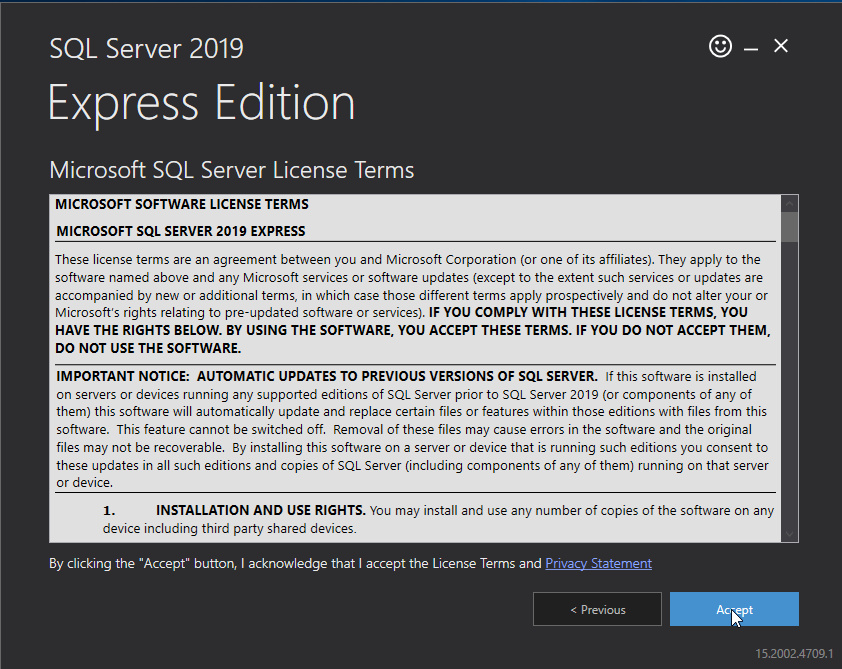
Accepting the Server License Terms
Accept the Microsoft SQL Server License Terms by selecting Accept at the bottom.
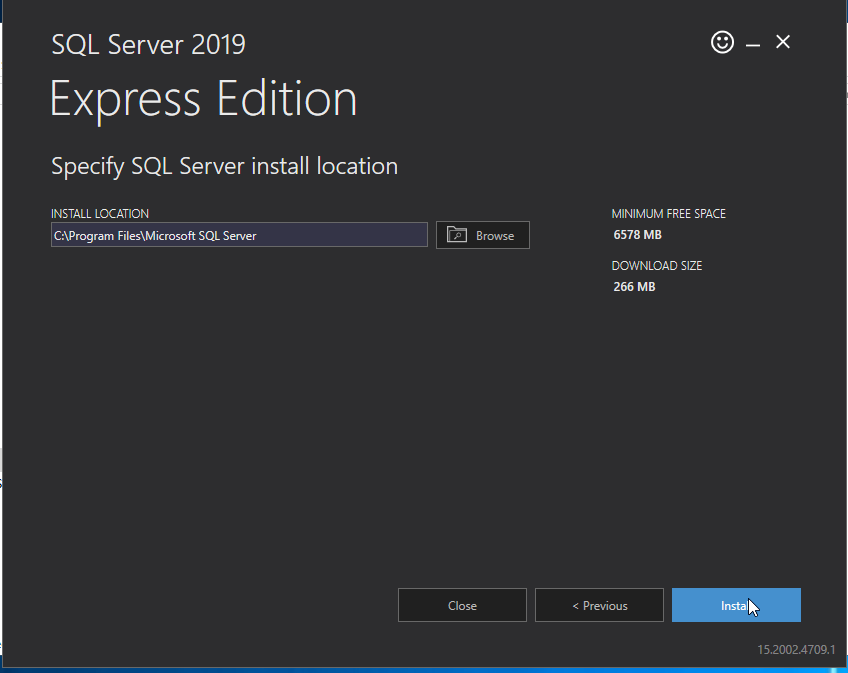
Selecting the Installation Location
Unless otherwise instructed by your supervisor allow the default installation location to be used and select Install.
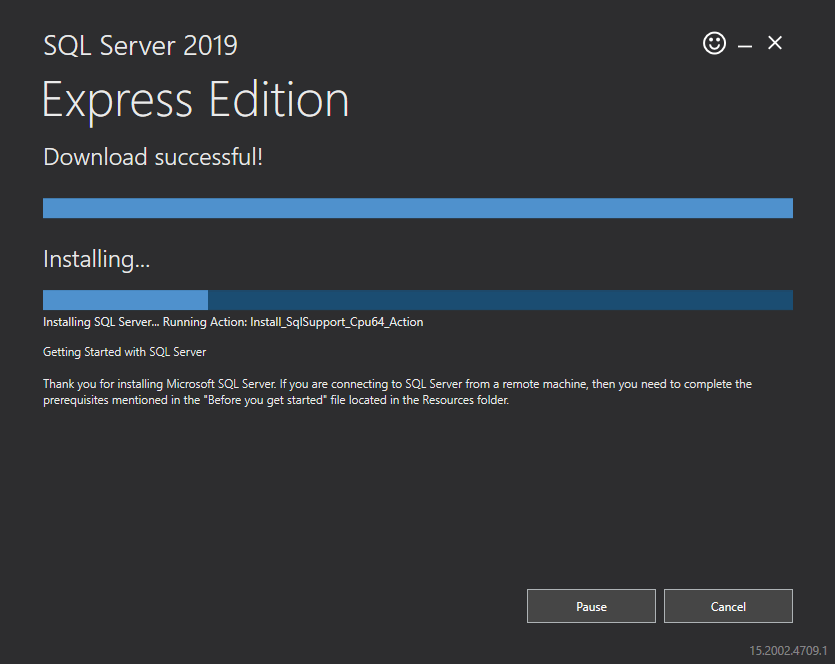
The Installation
The installer will then download the files needed for installation.
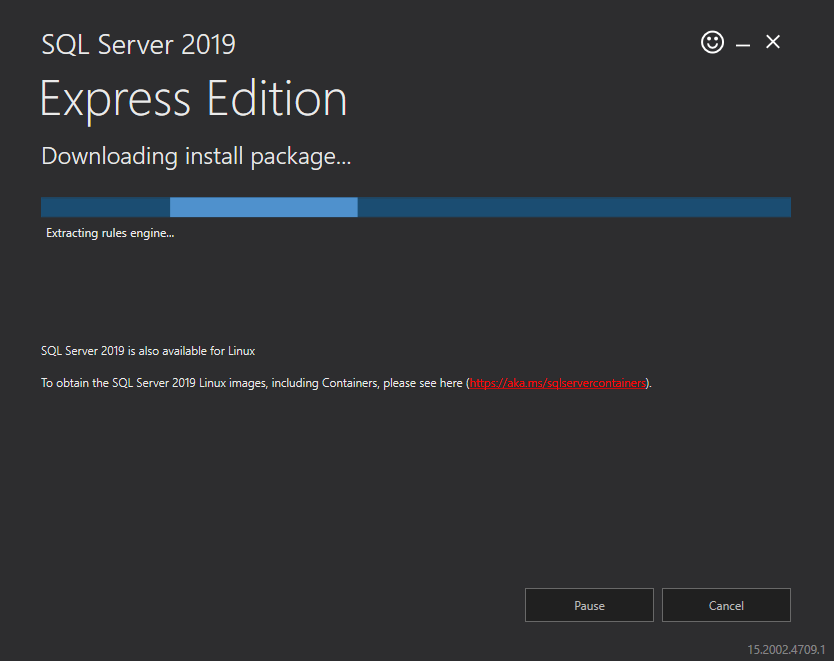
After downloading the installation files the installation will begin.
NOTE: This could take several minutes.
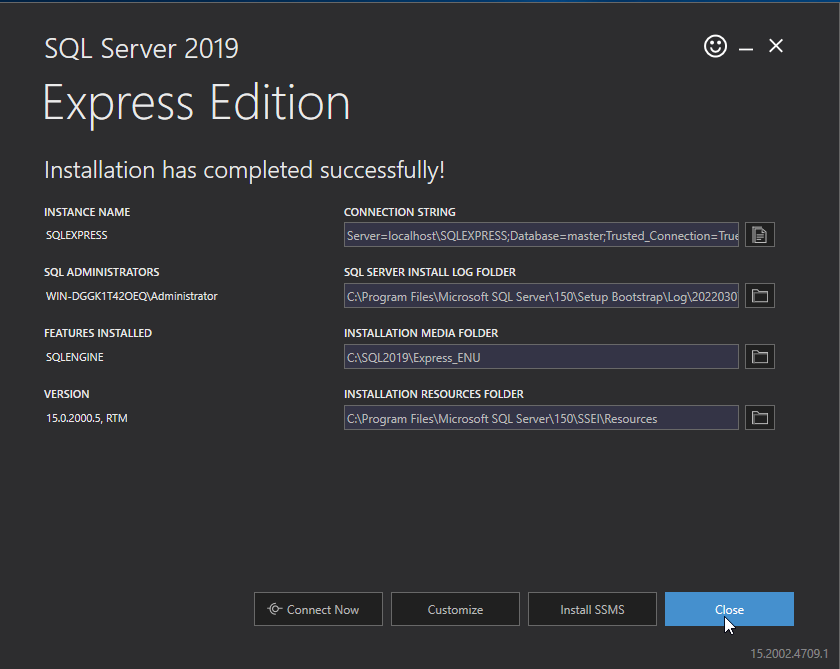
Finishing the Installation
Once the installation is complete Close the installer.
Microsoft SQL Management Studio Deployment Guide
Finding the Installer
To begin this installation please navigate to the File Explorer on the server in question by either selecting the File Explorer icon on the Task Bar as shown below:
Or by right clicking the Start Menu (Windows icon) on the task bar as shown below:
You will then need to navigate to This PC (Found in the Quick Access Menu on the left in the File Explorer) > Local Disk (C:) >temp
Or C:\temp.
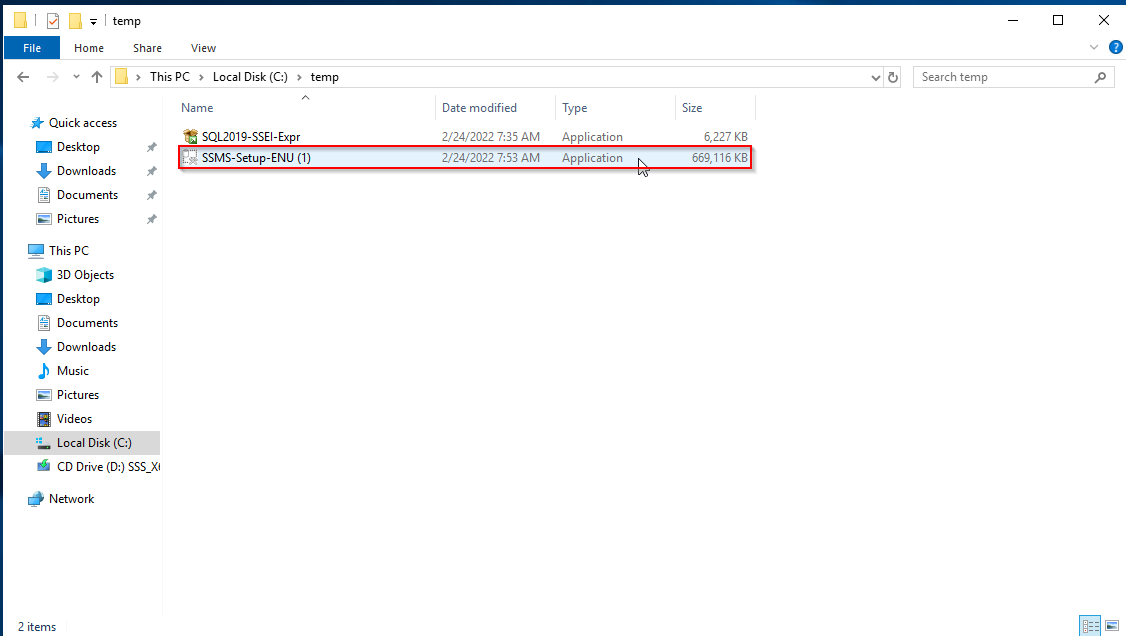
You will then need to select the SMSS-Setup-ENU application and double click it.
Selecting the Installation Location
Unless other wise instructed by your supervisor, install in the default location.
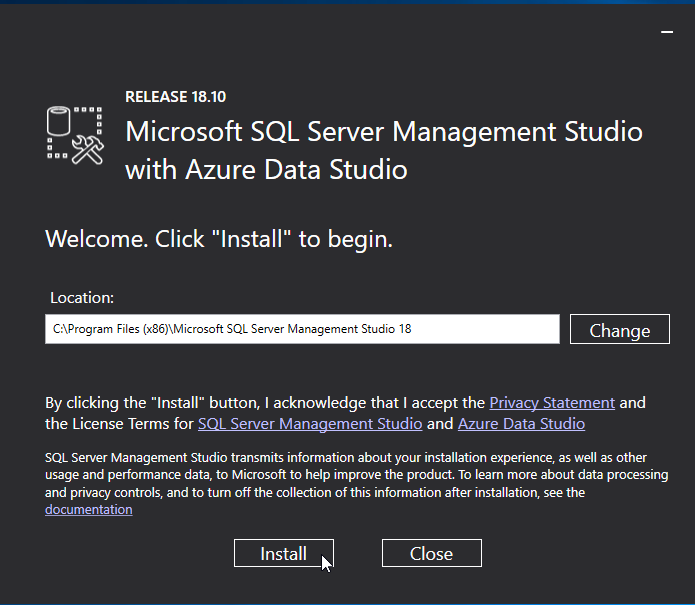
Once the intended installation location has been selected select Install.
The Installation
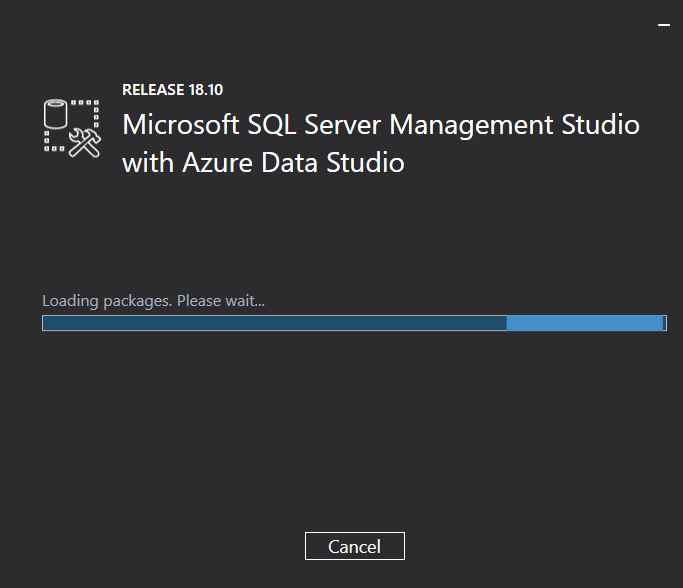
The installation has two phases, loading the packages and installing the packages.
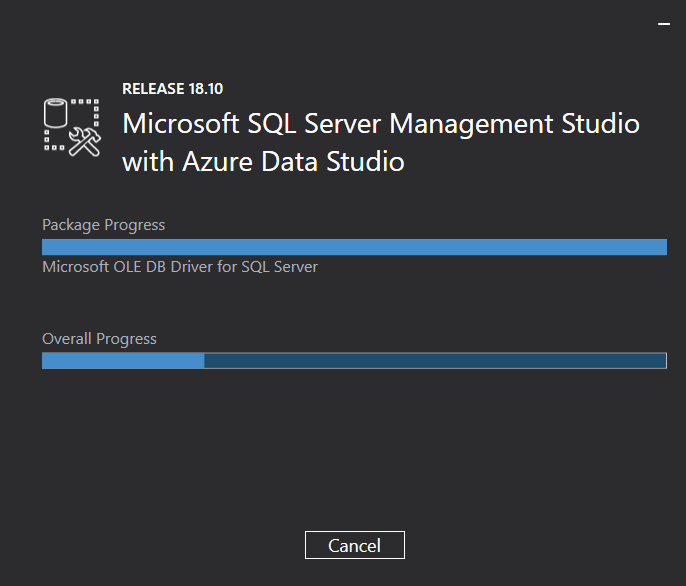
NOTE: This may take a few minutes.
Finishing the Installation
Once the installation is finished, you will need to restart the server which can be done through the installer.

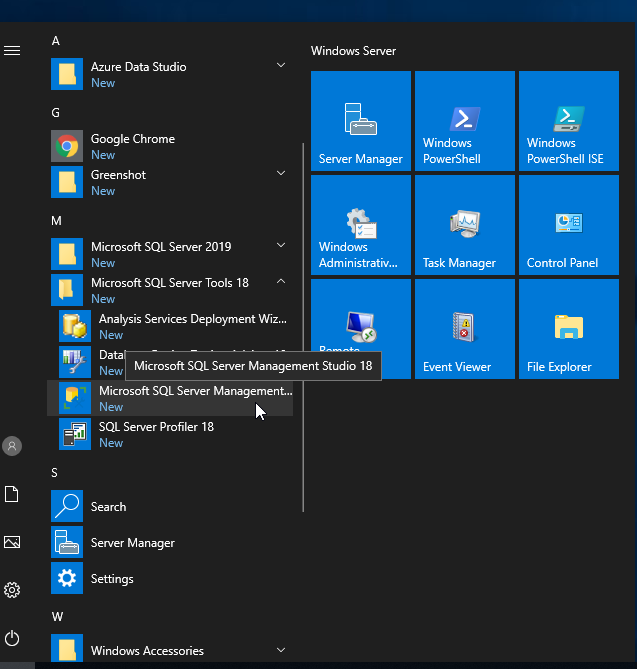
Locating the Microsoft SQL Server Management Studio
After restarting the server you can open the Microsoft SQL Server Management Studio by clicking on the start menu and navigating to the M section and selecting it.
RabbitMQ Deployment Guide
There are several ways to deploy RabbitMQ, in this guide we will focus on the Choclatey method, as it is the most reliable and fastest.
Install using Choclatey
After installing chocolatey, Open a powershell prompt and type the following command
choco install rabbitmqThis command will fully install RabbitMQ and all required software, once the script is complete you can continue to the RabbitMQ Configuration guide.
Deploying the Relay Controller without Docker
In this guide we will install the McTech RTLS Relay Controller software as a Windows service, not using Docker or Docker compose.
Required Software:
- Windows Server 2019 or later
- .NET Core 6
- Working MyChild6/StaffWatch6/AssetWatch6/WanderWatch6 Install
Downloading Deployment Package
When you are ready to begin deploying the Relay Controller software, you should being by downloading the Release Software from the ftp server, it should be with the MyChild6 releases and should be named something like `McTech.RelayController.<Version>.zip`
File Deployment:
For purposes of this guide, we will assume you have downloaded the .zip file from the last step in c:\temp on the target system.
Follow these steps
- Start by unpacking the zip file
- Create a new folder at C:\Program Files\McRoberts Technologies\McTech_RelayController
- Copy the files from C:\temp\<Name_Of_Folder from step 1> into the newly created folder in step 2
Once completed, you have now successfully installed the McTech Relay Controller software, next we want to create a windows service to automatically start the software when the computer boots, to do this, run the install-service.ps1 file that should be in the same folder as the files copied from the zip folder.
Now that the Relay Controller has been installed & a windows service created, follow the steps in the Configuration Guide to get it all setup and running.
Installing the MyChild6 Desktop Application
The MyChild6 Desktop application allows user to view the MyChild6 Application without using a browser. It also gives the user the ability to setup & configure a 'kiosk' type account which automatically logs in to the application. It also allows for MyChild6 Alarms to be displayed in windows notification pop-ups alongside the main web-based software.
To begin installing the MyChidl6 Desktop application, download the installer from the Releases Repository or the McRoberts Public FTP.

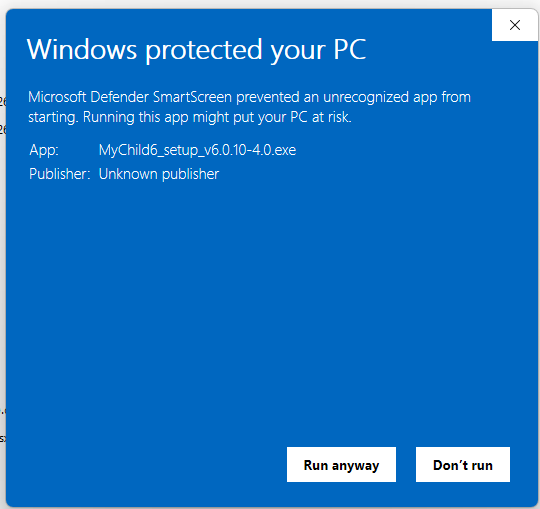
Once you have downloaded the installer, double click and the install should begin. If you are prompted that the application is unsigned, simply click 'Run anyway' and the install will start.
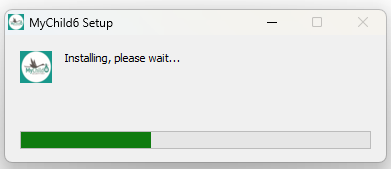
Once the install starts you should see a progress bar like this:
Once the install completes, the application will be started and the initial configuration screen should be displayed, it will look like this:

In the box under URL, enter your unique link to access MyChild6 via web.
Example: https://dev.mychildcloud.com and click "Save and Restart".
The application will restart and the MyChild6 application should be displayed upon restart.