Downloading and Installing Microsoft SQL Server
Installing & Configuring Microsoft SQL Server Express 2012
After downloading the Microsoft SQL Server Express Installer Package run it by double clicking on it.
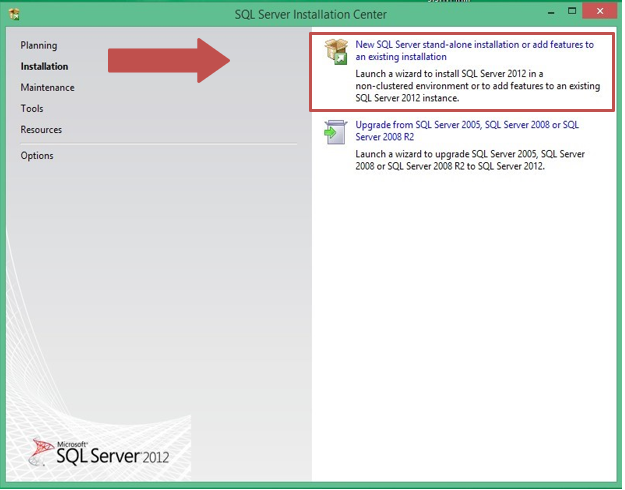
The installer package will begin to extract files from the package. Once that has completed you will be presented with a screen as seen below.
Click the indicated link below to begin the installation!
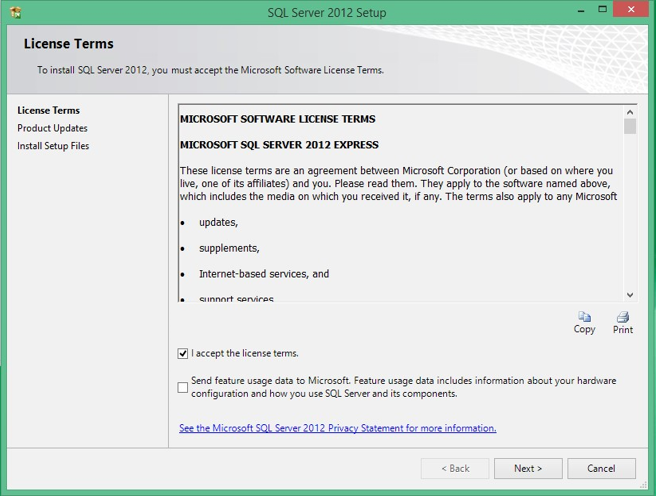
Accepting the License Terms for Microsoft SQL Server Express 2012
You will be asked to accept the License Terms. To complete this select the check box next to 'I accept the license terms.' and click next.
Note: Be sure to leave the box below that unchecked.
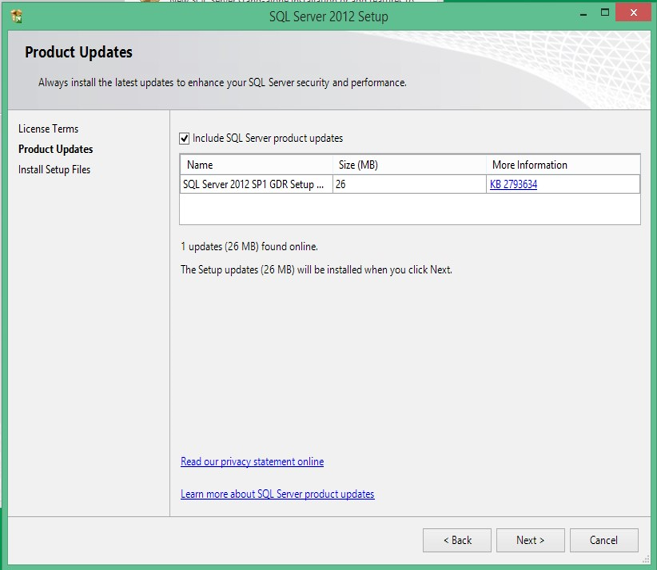
Setting up the Product Updates for Microsoft SQL Server Express 2012
Select the check box next to 'Include SQL Server product updates', then click next.
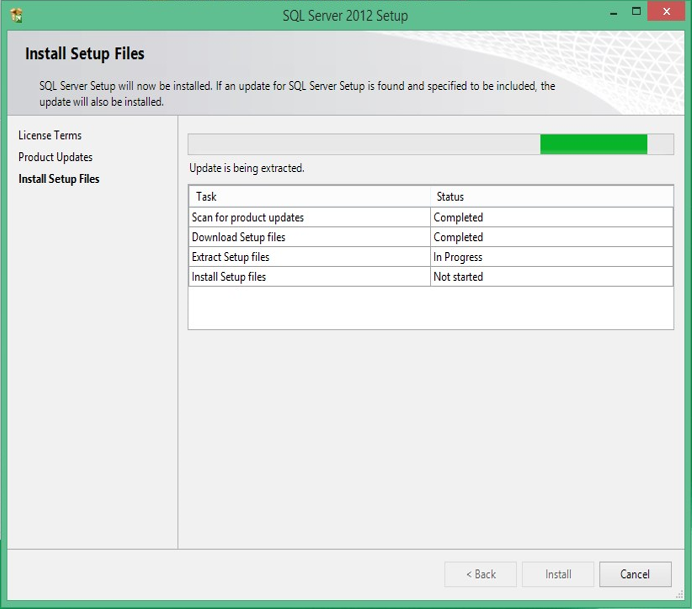
The installation of the Setup Files for Microsoft SQL Server Express 2012
Wait for the installation process to complete and click next.
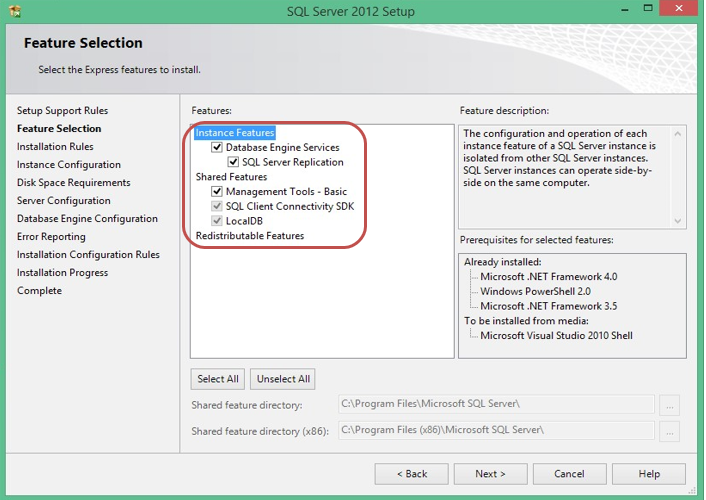
Microsoft SQL Server Express 2012 Feature Selection
During the SQL installation process, you will be asked to select features for the SQL Server.
Be sure to check ALL features as shown in the screen shot.
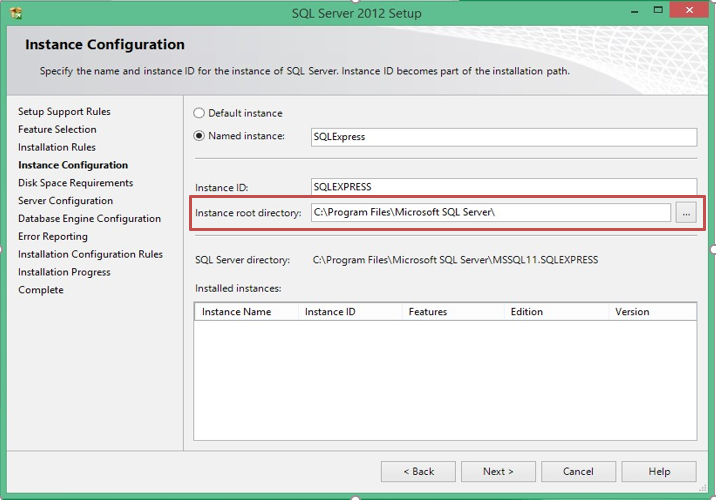
Microsoft SQL Server 2012 Instance Configuration
During this phase of the installation, you will be asked to setup an instance name for the SQL Server.
The Named Instance is the name we use to connect to the SQL Server.
The default "SQLExpress" can be used.
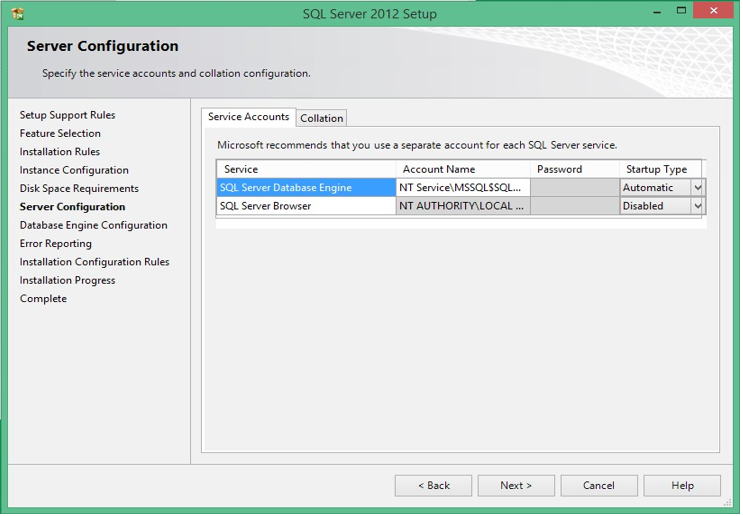
Microsoft SQL Server Express 2012 Server Configuration
Make sure the Account Names and Startup types match the image above.
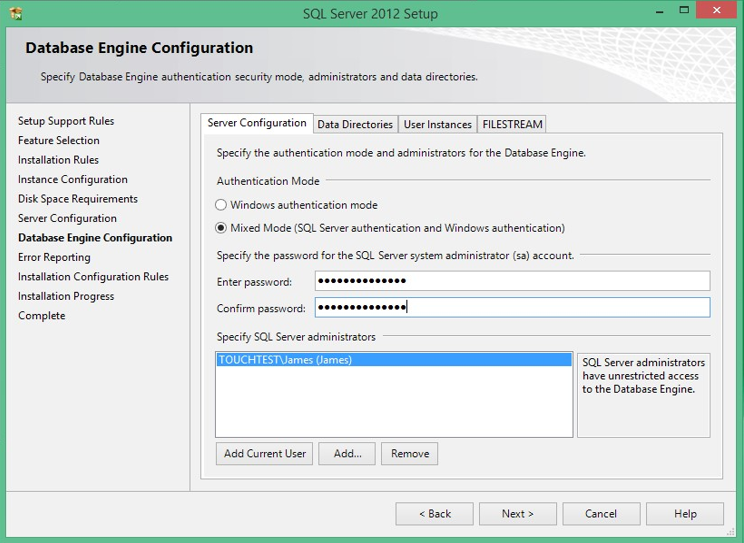
Microsoft SQL Server 2012 Database Engine Configuration
On this screen we need to make a few changes.
Set the Authentication Mode to
- Mixed Mode (SQL Server Authentication and Windows Authentication)
- Set the Password to McR0berts.1876 (Note: That is a zero)
Note: Do NOT add another user unless otherwise instructed by your supervisor.
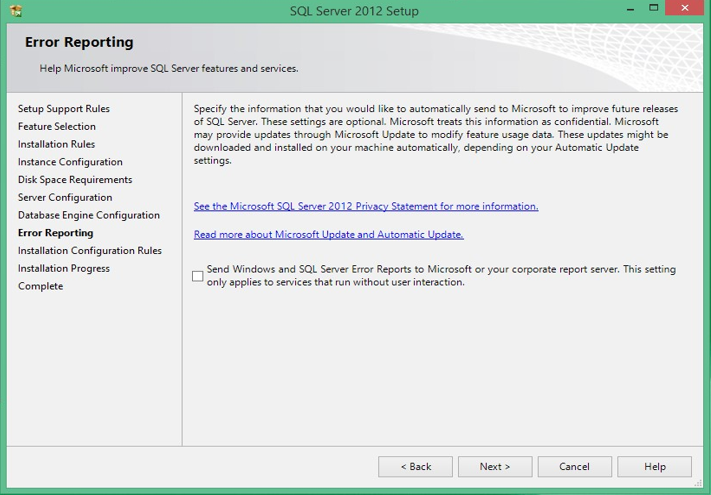
Microsoft SQL Server Error Reporting
Do not select anything, click next
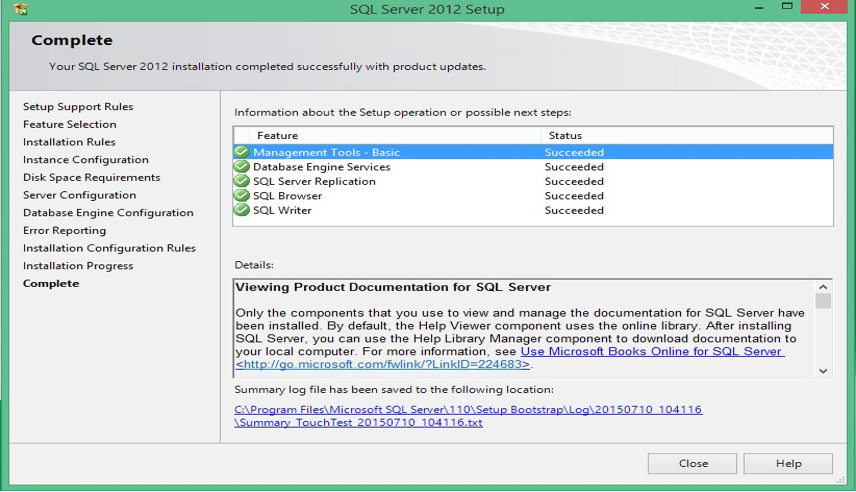
Installation Completed!
If everything went as expected, you should be presented with a “Complete” screen (as shown below) once on this screen, you can close the wizard and move on to the next step.

No Comments