Microsoft SQL Server Configuration
Now that you have successfully installed Microsoft SQL Server, we will need to enable SQL logins and create a user account for the MyChild6 software to use.
Enable SQL Logins
Follow these steps to enable SQL Logins
- Launch the SQL Management studio
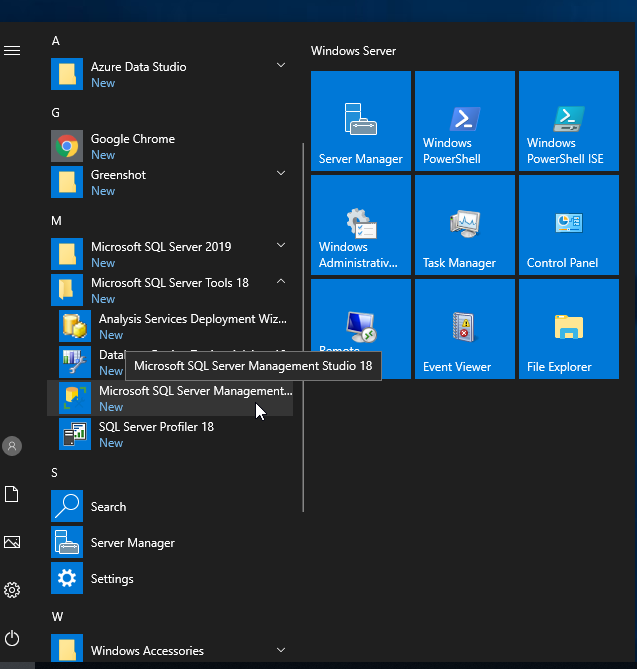
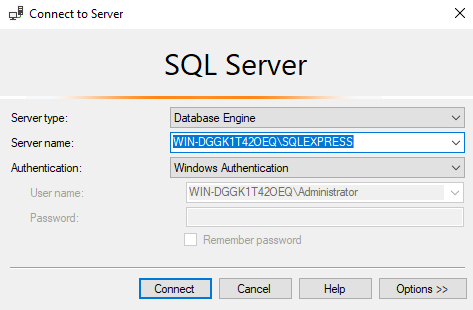
- Connect to the SQL Server instance (typically localhost\sqlexpress if using SQL express)
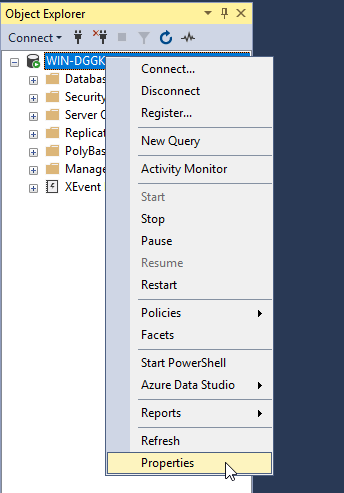
- Once connected, locate the "Object Explorer" pane (on the left)
- Right click on the SQL Server (Should be the top level object, with the same name as the server)
- Click Properties on the popup menu
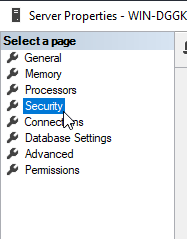
- When the "Server Properties" window opens, locate the "Select a page" section (upper left corner)
- Select "Security" from the "Select a page" section
- Ensure the radio button next to "SQL Server and Windows Authentication mode" is selected
- Click OK
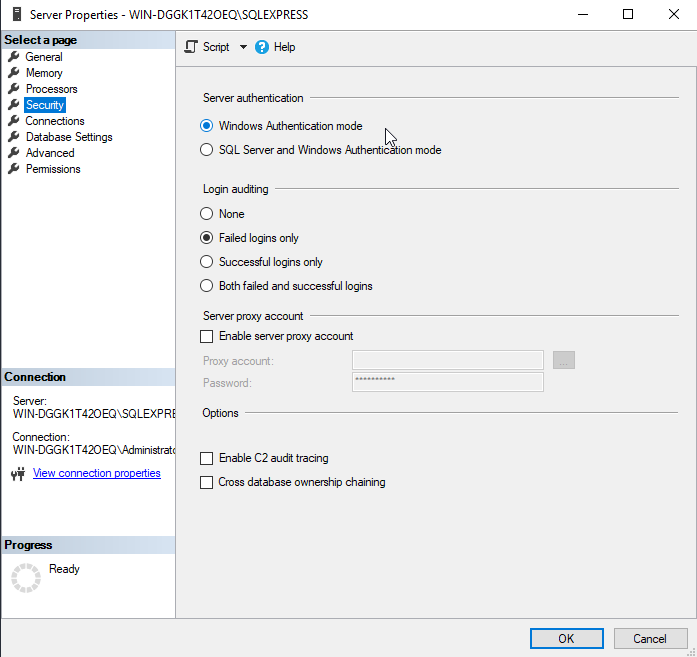
Next you will need to restart the SQL Server for the changes to take effect, to restart the SQL Server, follow these steps
- Locate the "Object Explorer" pane (on the left)
- Right click on the SQL Server (Should be the top level object, with the same name as the server)
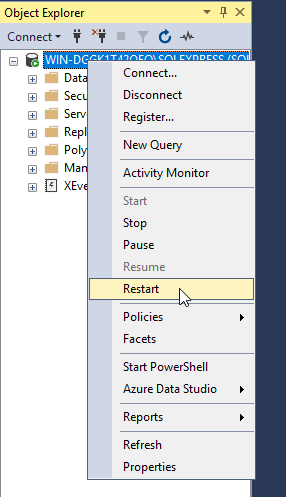
- Click "Restart"
- Click "Yes" on the confirmation popup

You have now successfully enabled SQL Server logins. Next we will Add a new user account.
Create a new SQL User account
We need to create an SQL user account that the MyChild6 software can use to communicate with the database server, we will be using the SQL Management studio, Follow these steps
- Login to the SQL Server
- Using the Object Explorer, Expand the "Security" folder.
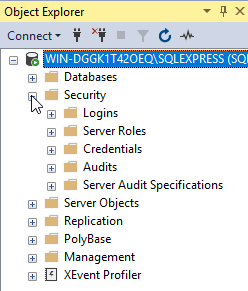
- Right click on the folder labeled "Logins"
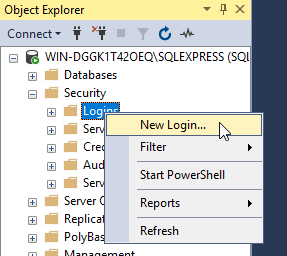
- Click "New Login" from the popup menu
Once the "Login - New" window opens, follow these steps to create the user account
- Enter a name for the user (We recommend mychild)
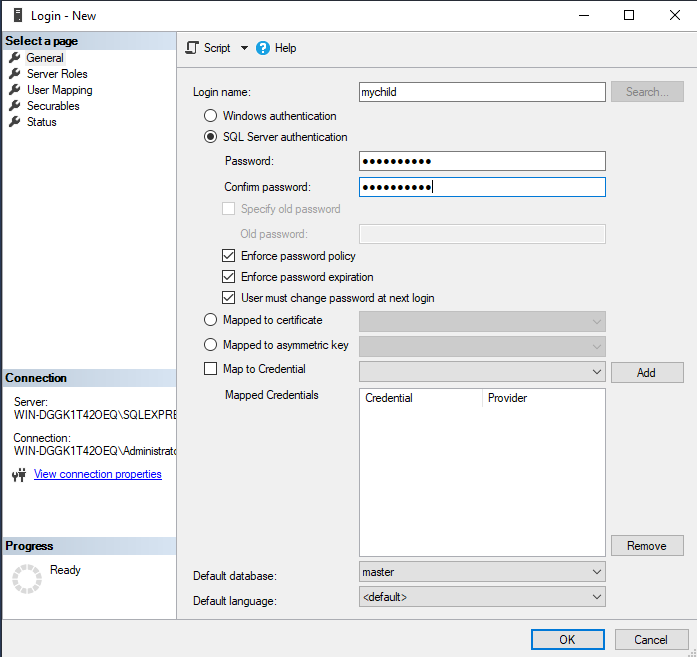
- Select the radio button next to "SQL Server authentication"
- Enter a password and Confirm password for this account (Note: please avoid using $ and , as special characters!)
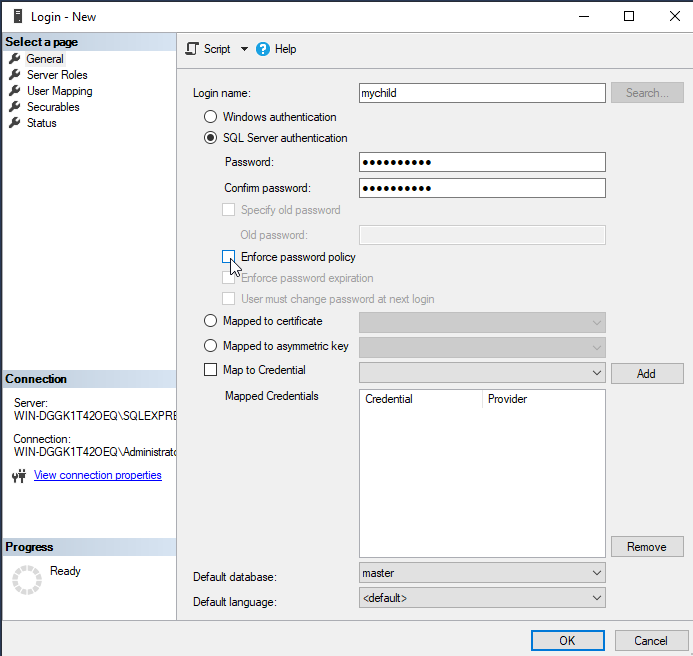
- Uncheck the boxes for "Enforce password policy" which should disable the next 2 checkboxes as well
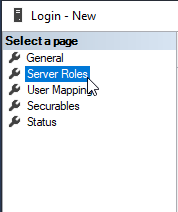
- Locate the "Select a page" section in the upper left corner and select the "Server Roles" page
- On the "Server Roles" page, check the box next to "dbcreator"
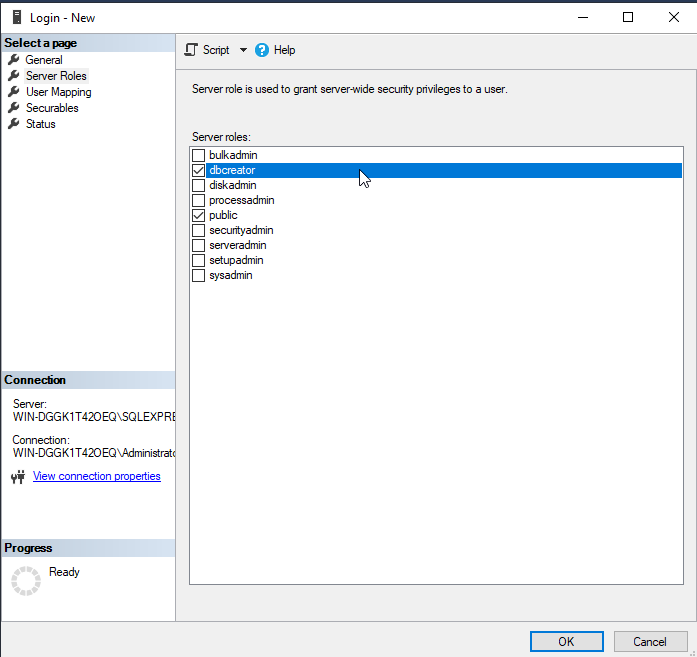
- Click "OK"
You have now successfully created a user account on your SQL Server.
Please proceed to the Minio Configuration Guide for next steps.

No Comments